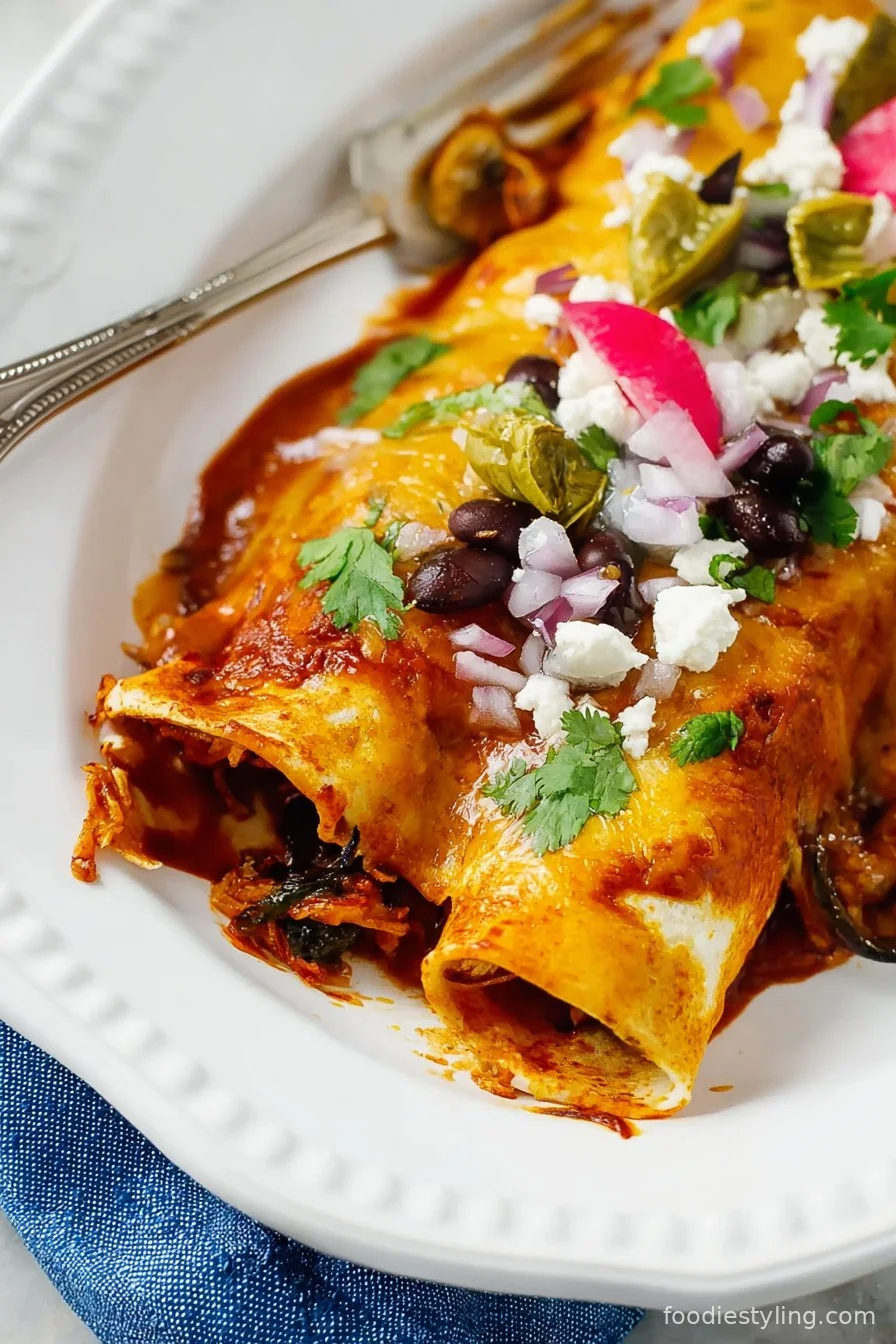
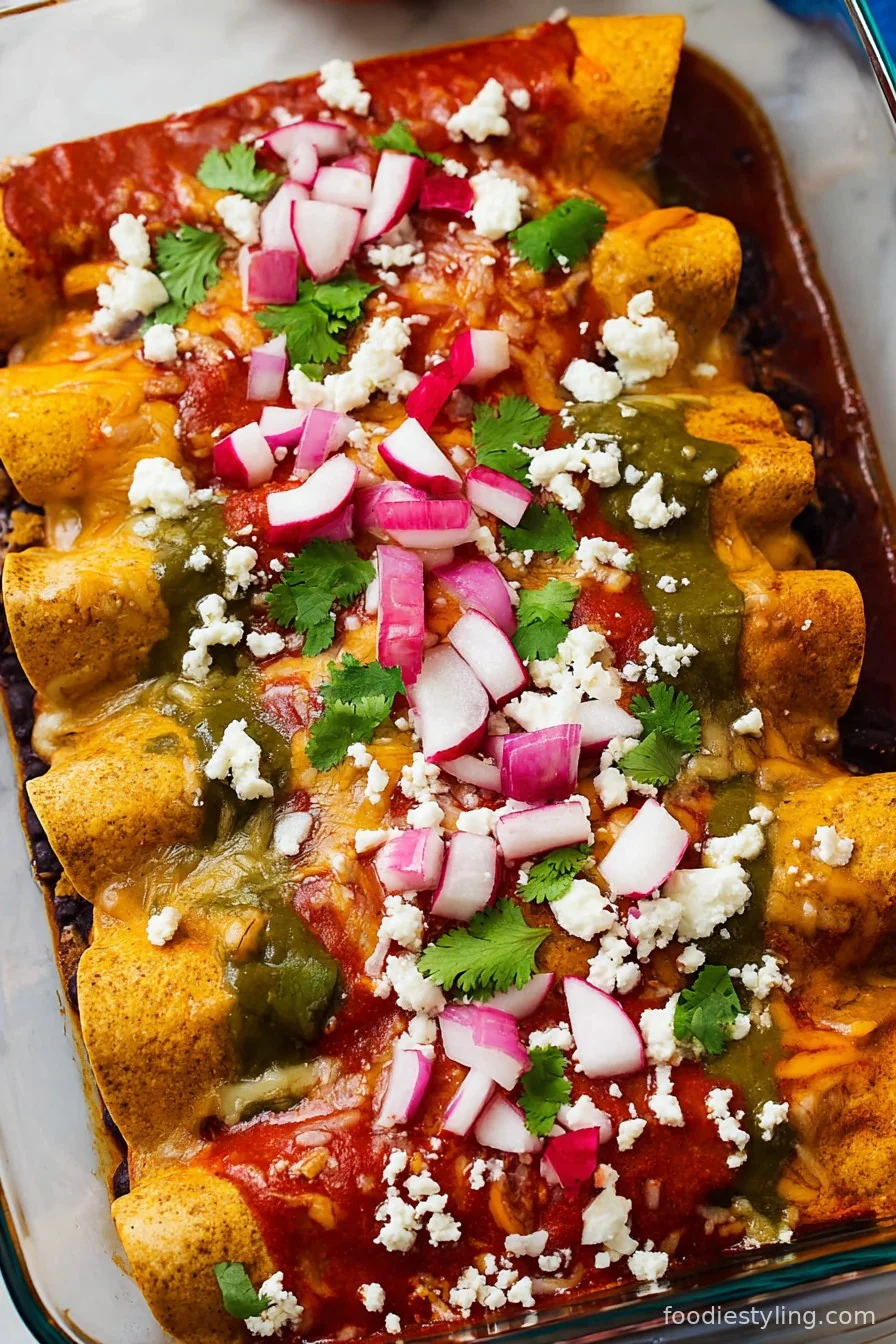
’Tis the season for flavor! Meet your new favorite festive dinner: Christmas Enchiladas. These are absolutely dreamyâ€â€oozing with melty cheese, wrapped in tender tortillas, and smothered in both red AND green enchilada sauce for that merry, eye-catching holiday look.
The taste is rich, bold, and comforting, with a creamy chicken filling and just the right kick of spice. The double sauce not only looks amazing, but brings a zesty, tangy punch that makes every bite irresistible.
I love serving these on Christmas Eve or at any December partyâ€â€everyone is wowed by the gorgeous presentation and cozy flavors. This recipe was inspired by a beloved family tradition and is perfect for feeding a hungry crowd.
If you want a showstopper that feels both decadent and low effort, these enchiladas are the answer. Get ready to hear “Can I have seconds?” all night long!
Why You'll Love This Recipe
- A festive, colorful dish that brightens up any table with classic red and green holiday flair
- Easy to customize with your favorite protein or make it vegetarian
- Perfect for prepping in advanceâ€â€just bake before serving
- Crowd-pleasing comfort food that’s guaranteed to impress guests
- The ultimate cozy, cheesy entree for holiday meals or winter gatherings
Key Ingredients for Christmas Enchiladas
See recipe card below for full list of measurements, ingredients, and instructions.Red and Green Enchilada Sauces
These are the shining star of Christmas Enchiladas, giving the dish its signature festive look and two-for-one punch of flavor. Go for good-quality canned sauces for maximum convenience, or make your own if you prefer. If you’re heat-sensitive, choose mild saucesâ€â€otherwise, a mix of mild and medium is delicious. Feel free to swap one for the other if you prefer just red or green.
Shredded Cooked Chicken
Chicken keeps the enchiladas hearty and tender, absorbing all the seasonings and sauce. Rotisserie chicken is the ultimate shortcut, but you can also use leftover turkey or roast your own. For a vegetarian twist, substitute with sautéed mushrooms or black beans.
Monterey Jack and Cheddar Cheese
Cheese is the glue that makes everything gooey, golden, and irresistible. I recommend a blend of mild Monterey Jack for creaminess and sharp cheddar for extra zip. Pre-shredded cheese works in a pinch, but shredding your own melts silkier.
Corn Tortillas
Corn tortillas have unbeatable flavor and stay wonderfully tender after baking. Look for medium (6-inch) size. Warm them before filling so they roll easily and don’t break. If you only have flour tortillas, you can use those, though the texture will be softer.
Fresh Cilantro and Green Onions
These add a final burst of color and fresh flavor that really lifts the rich dish. You can also use a sprinkle of fresh parsley or extra sliced jalapeños for garnish if desired.
Instructions for Christmas Enchiladas
See recipe card below for full list of measurements, ingredients, and instructions.Warm the Tortillas
Heat the olive oil in a skillet over medium. Quickly warm each tortilla for about 15 seconds per side until pliableâ€â€this will keep them from cracking when you roll them. Stack them on a plate and cover to keep warm.
Make the Chicken Filling
In a large bowl, combine the shredded chicken, 1 cup Monterey Jack cheese, ½ cup cheddar, sour cream, green onions, cilantro, cumin, garlic powder, salt, and pepper. Mix everything well so the filling is creamy and evenly seasoned.
Fill and Roll the Enchiladas
Working one at a time, spoon about ¼ cup of the chicken filling into the center of each tortilla. Roll tightly and place seam-side down in a greased 9x13-inch baking dish.
Add the Sauces (Red and Green!)
Once all enchiladas are rolled and nestled in the dish, pour the red enchilada sauce over half of the enchiladas (lengthwise down the dish). Pour the green enchilada sauce over the other half. Use a spoon to gently spread, making sure they don’t mix much in the middle for the prettiest presentation.
Top with Cheese
Sprinkle the remaining Monterey Jack and cheddar cheeses over all the enchiladas.
Bake to Perfection
Bake in a preheated 375 °F (190 °C) oven for 22–25 minutes, until the cheese is bubbling and golden at the edges.
Garnish and Serve
Let cool for 5 minutes, then scatter with extra green onions, cilantro, and any desired garnishes like jalapeño slices or pomegranate seeds. Serve immediately and enjoy the festive flavors!
Recipe Variations
Vegetarian Christmas Enchiladas
Swap out the chicken for a mix of black beans, sautéed spinach, and corn for a protein-packed vegetarian version. You could also add roasted butternut squash or sweet potatoes for extra holiday flair.
Super Saucy Version
Love extra sauce? Double the amount of red and green enchilada sauce for a more luscious, decadent casserole-style bake. Just add an extra 10 minutes to the baking time.
Creamier, Tex-Mex Style
For an ultra-creamy filling, add 4 ounces of softened cream cheese to the chicken mixture. This works especially well with flour tortillas.
Make It Gluten-Free
Just make sure to use certified gluten-free corn tortillas and check both enchilada sauces for any hidden wheat ingredients. Most brands are naturally gluten-free, but always confirm.
Spice It Up
Add a can of chopped green chiles or diced jalapeños to the filling for a spicier kick, or drizzle with your favorite hot sauce right before serving.
Serving Suggestions
Round out your Christmas Enchiladas with a festive spread! Pair them with Spanish rice or cilantro-lime rice, a bowl of refried or black beans, and a crunchy green salad tossed with creamy avocado. For extra holiday sparkle, sprinkle the enchiladas with pomegranate seeds and serve with lime wedges for squeezing at the table.
Storage and Reheating
Store leftover Christmas Enchiladas in an airtight container in the refrigerator for up to 4 days. To reheat, cover with foil and warm in a 350 °F oven until heated through (about 15–20 minutes). Individual portions can be microwaved for 1–2 minutes. These enchiladas freeze beautifullyâ€â€wrap tightly and freeze for up to 2 months, then bake from frozen, adding an extra 10–15 minutes.
Frequently Asked Questions About Christmas Enchiladas (FAQ)
Q: Can I make Christmas Enchiladas ahead of time?A: Absolutely! Assemble the enchiladas (up to the baking step), cover tightly, and refrigerate for up to 24 hours. Add a few extra minutes to the bake time if going straight from the fridge.
Q: What’s the best way to prevent soggy enchiladas?A: Quickly warming and lightly frying the tortillas first helps them stay firm. Also, don’t oversaturate with sauce before bakingâ€â€add extra after baking if you like.
Q: Can I use another protein instead of chicken?A: Definitely! Shredded turkey, ground beef, or even sautéed mushrooms all work well in this recipe. Use whatever sounds tastiest or is on hand.
Ready to make your holidays even more delicious? These Christmas Enchiladas are festive, flavorful, and destined to become a new tradition. I can’t wait for you to wow your crowd! Give this recipe a try and let me know how you like itâ€â€leave a comment or rating below!
Ingredients
- 3 cups cooked chicken, shredded (rotisserie or homemade)
- 2 cups Monterey Jack cheese, shredded
- 1 cup sharp cheddar cheese, shredded
- ½ cup sour cream
- ¼ cup green onions, finely sliced (plus more for garnish)
- ¼ cup fresh cilantro, chopped (plus more for garnish)
- 1 (10 oz) can red enchilada sauce
- 1 (10 oz) can green enchilada sauce
- 12 corn tortillas (6-inch)
- 2 tablespoons olive oil
- ½ teaspoon cumin
- ½ teaspoon garlic powder
- ½ teaspoon salt
- ¼ teaspoon black pepper
- Optional: sliced jalapeños, pomegranate seeds, or lime wedges for serving
Instructions
-
1Preheat oven to 375 °F (190 °C). Lightly oil a 9x13-inch baking dish.
-
2Warm tortillas in a skillet with a little olive oil, 15 seconds per side, then cover to keep warm.
-
3In a large bowl, mix shredded chicken, 1 cup Monterey Jack, ½ cup cheddar, sour cream, green onions, cilantro, cumin, garlic powder, salt, and pepper.
-
4Spoon about ¼ cup filling onto each tortilla. Roll up tightly and arrange seam-side down in the baking dish.
-
5Pour red enchilada sauce over one half of the enchiladas and green sauce over the other half. Gently spread to cover but don’t mix too much.
-
6Sprinkle the remaining cheese evenly over the top.
-
7Bake for 22–25 minutes, or until cheese is melted and bubbly.
-
8Let rest 5 minutes, then top with extra green onions, cilantro, and any optional garnishes before serving.
Approximate Information for One Serving
Nutrition Disclaimers
Number of total servings shown is approximate. Actual number of servings will depend on your preferred portion sizes.
Nutritional values shown are general guidelines and reflect information for 1 serving using the ingredients listed, not including any optional ingredients. Actual macros may vary slightly depending on specific brands and types of ingredients used.
Did you make this recipe?
Please consider Pinning it!!