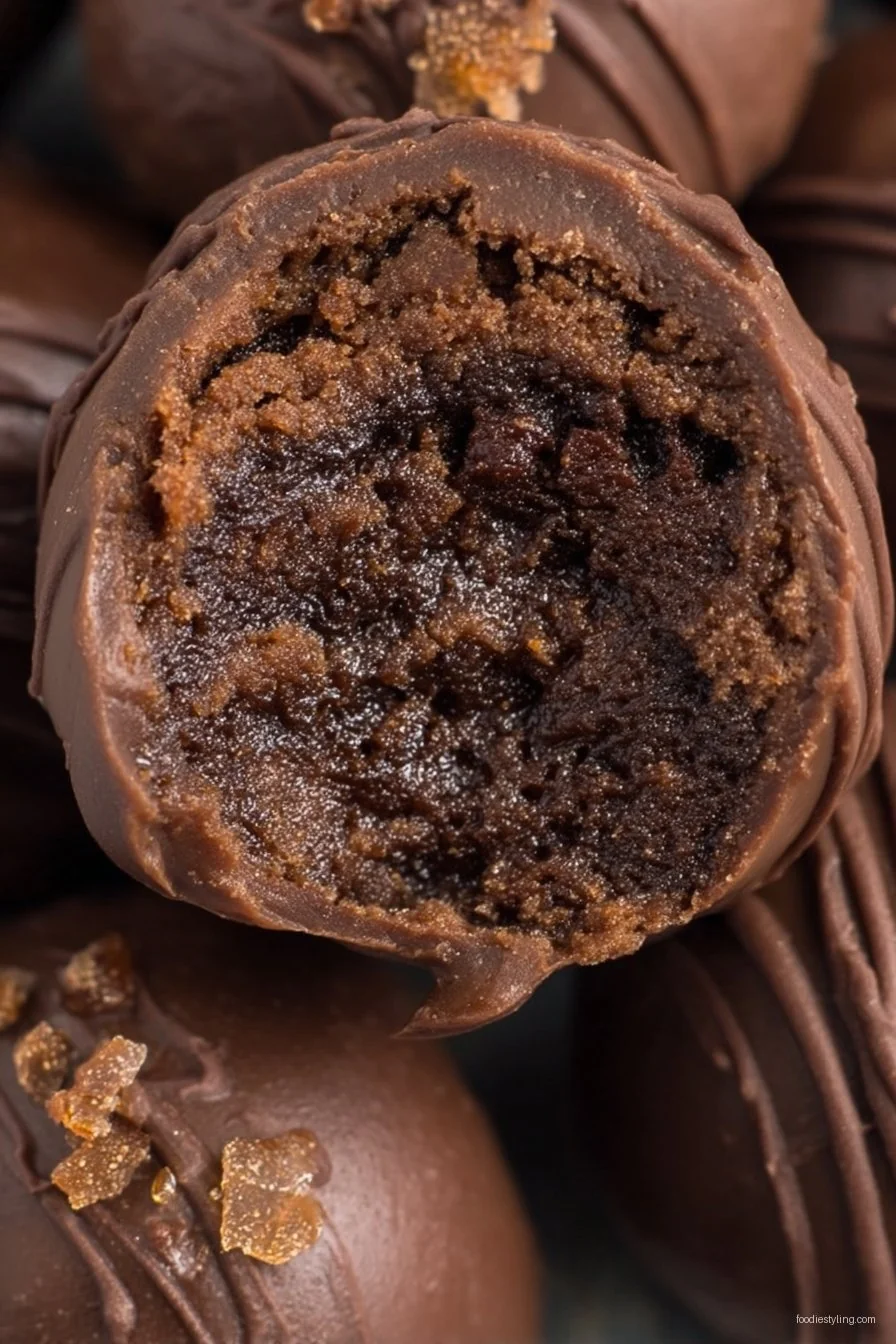
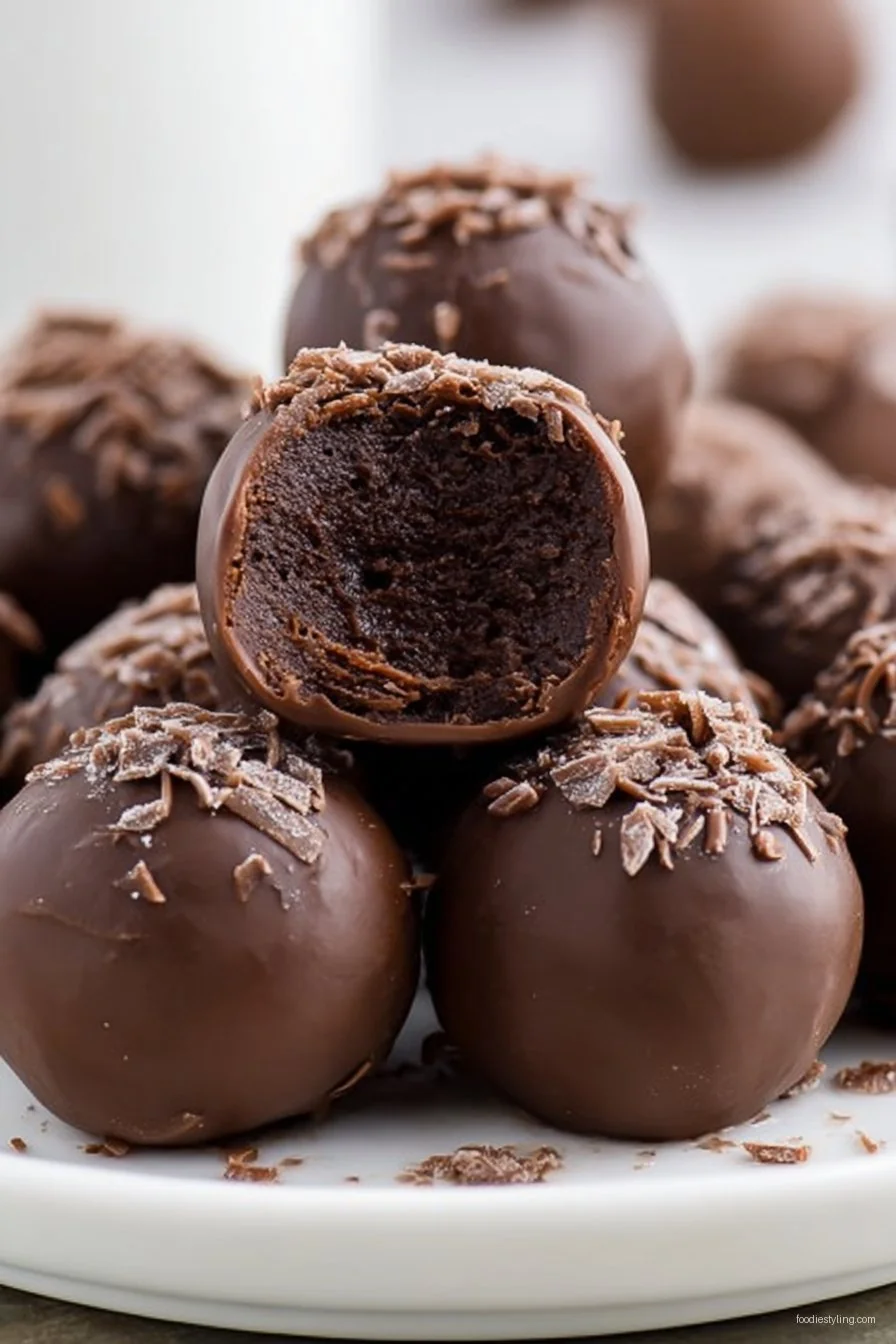
If you're on the hunt for an effortlessly decadent treat, these Easy Brownie Truffles are absolutely dreamy! Each bite is irresistibly rich, fudgy, and packed with deep chocolate flavor, all wrapped up in a silky chocolate shell.
What makes these truffles so special? They're the ultimate shortcut dessertâ€â€just bake a pan of brownies, crumble, roll, and dip. No special equipment or candy thermometers required! They're a real showstopper for parties, holidays, or when chocolate cravings strike.
Whether you need a quick make-ahead treat for a potluck or want to indulge your sweet tooth with minimal effort, these brownie truffles deliver every time. They're also a long-time family favorite in my houseâ€â€disappearing faster than I can make them!
Why You'll Love This Recipe
- Quick and effortlessâ€â€no fancy equipment or candy-making skills required!
- Rich, chocolaty, fudgy centers with a crisp chocolate shell.
- Customizable toppings for holidays, gifts, and special occasions.
- Make-ahead friendly and freezer-safe for ultimate convenience.
Key Ingredients for Easy Brownie Truffles
See recipe card below for full list of measurements, ingredients, and instructions.Brownie Mix (Boxed or Homemade)
Brownies form the luscious, fudgy core of these truffles. Use your favorite boxed brownie mix for ultimate easeâ€â€just bake and cool. If you're feeling adventurous, homemade brownies work great too! For best results, opt for a mix that’s extra fudgy rather than cakey, and avoid varieties with extra mix-ins like caramel, as these can make rolling tricky.
Cream Cheese
Softened cream cheese binds the brownie crumbs, giving the truffle centers a creamy, melt-in-your-mouth texture. Be sure to let it come to room temperature for easy mixing. If you need a dairy-free version, vegan cream cheese can be substituted, though it may slightly alter flavor and texture.
Semisweet or Dark Chocolate
Melting chocolate forms the glossy, snappy coating around each truffle. Semisweet or dark chocolate chips are both fantastic choicesâ€â€just ensure they're good quality for a beautifully smooth dip. In a pinch, milk chocolate or chocolate melting wafers will also do the trick, but will be a bit sweeter.
Sprinkles, Crushed Nuts, or Cocoa Powder (Optional)
These add a fun, festive flair and delightful texture! Classic rainbow sprinkles, crushed pecans, or even a dusting of cocoa powderâ€â€anything goes. Choose toppings that match your occasion, or leave them plain for an elegant finish.
Instructions for Easy Brownie Truffles
See recipe card below for full list of measurements, ingredients, and instructions.Bake and Cool the Brownies
Prepare and bake the brownies according to package or homemade recipe instructions. Let them cool completely in the panâ€â€this helps the texture firm up so truffles will hold together nicely.
Crumble the Brownies
Once cool, scoop the brownie from the pan into a large bowl, discarding any hard edge pieces if desired. Crumble the brownies with your hands or a fork until fine, even crumbs form.
Mix with Cream Cheese
Add the softened cream cheese to the brownie crumbs. Mix thoroughly with a spoon or clean hands until the mixture is thick, well combined, and holds together when squeezed.
Roll into Balls
Use a small cookie scoop or tablespoon to portion the mixture. Roll each portion between your palms to form even, 1-inch balls. Place them onto a parchment-lined baking sheet. Chill in the freezer for 20–30 minutes to firm up.
Melt the Chocolate
Meanwhile, combine chocolate chips and coconut oil (if using) in a microwave-safe bowl. Microwave in 30-second bursts, stirring between each, until fully melted and smooth. Let cool slightly for a couple minutes.
Dip and Decorate
Using a fork or dipping tool, dip each chilled truffle ball into the melted chocolate, tapping off any excess. Return to the parchment sheet and immediately top with sprinkles, nuts, or cocoa powder if desired. Repeat with remaining truffles.
Set and Serve
Let the chocolate set at room temperature (about 15 minutes) or refrigerate for 5–10 minutes until firm. Enjoy right away or store for later!
Recipe Variations
Make It Gluten-Free
Substitute your favorite gluten-free brownie mix to create truffles everyone can enjoy. Be sure to double-check all other ingredients for gluten content, especially sprinkles and decorations.
Vegan Brownie Truffles
Use a vegan brownie mix (or your own recipe), dairy-free cream cheese, and high-quality dairy-free chocolate. The results are every bit as fudgy and decadent as the original!
Flavored Truffles
Try adding a teaspoon of espresso powder or a splash of vanilla to the brownie mixture for a sophisticated flavor twist. Love a hint of spice? Mix in a pinch of cinnamon or cayenne for Mexican chocolate vibes.
Nutty Crunch
Roll the finished truffles in chopped toasted nuts like pecans, hazelnuts, or almonds for extra crunch and a beautiful presentation.
Holiday Ready
Change up your sprinkles and toppings to match the occasionâ€â€red and green for Christmas, pastel for Easter, or crushed peppermint for a wintery touch.
Serving Suggestions
Pile these Easy Brownie Truffles high on a pretty dessert platter and serve as a fun centerpiece at potlucks, bake sales, or parties. They're also delicious paired with fresh berries or alongside a scoop of vanilla ice cream for a more decadent treat. Top with a light dusting of powdered sugar or sea salt flakes for an elegant finish!
Storage and Reheating
Store leftover truffles in an airtight container in the fridge for up to 1 weekâ€â€they taste great chilled! For longer storage, freeze in a single layer for up to 2 months, then transfer to a freezer bag. To serve, thaw overnight in the fridge. No reheating requiredâ€â€just enjoy straight from the fridge or let sit at room temperature for a few minutes if you prefer a softer bite.
Frequently Asked Questions About Easy Brownie Truffles (FAQ)
Q: Can I use homemade brownies instead of box mix?A: Absolutely! Just be sure your homemade brownies are rich and fudgy rather than cakey for the best truffle texture.
Q: Do I need to use cream cheese?A: Cream cheese creates a creamy, cohesive filling, but you can substitute with Nutella, peanut butter, or a dairy-free alternative, adjusting the amount as needed for the right consistency.
Q: How far ahead can I make brownie truffles?A: You can make these up to a week in advance and keep them fresh in the fridge, or freeze for a couple months! Prep ahead for hassle-free entertaining.
There's nothing quite like the rich, fudgy bite of these Easy Brownie Trufflesâ€â€one taste and you'll be hooked! They're the perfect treat for chocolate lovers and party-goers alike. Give them a try, and don’t forget to leave a comment or rating below to let me know how yours turned out!
Ingredients
- 1 box (18–19 oz) brownie mix, plus ingredients required to prepare (usually eggs, oil, water)
- 4 oz (half block) cream cheese, softened
- 10 oz semisweet or dark chocolate chips (for coating)
- 1 tablespoon coconut oil or vegetable shortening (optional, for smoother coating)
- Sprinkles, crushed nuts, or cocoa powder for decoration (optional)
Instructions
-
1Prepare and bake brownies as instructed on the box or your homemade recipe. Let brownies cool completely.
-
2Crumble the brownies into a large bowl, removing hard edges if you prefer.
-
3Add softened cream cheese and mix until a uniform, dough-like texture forms.
-
4Roll mixture into 1-inch balls and place on a parchment-lined tray. Freeze balls for 20–30 minutes to firm.
-
5Melt chocolate chips and coconut oil (if using) in 30-second microwave bursts, stirring between each, until smooth.
-
6Dip each chilled truffle in melted chocolate using a fork. Place back on tray and top with sprinkles or other decorations as desired.
-
7Let truffles set at room temperature or in the fridge for 10 minutes until chocolate is firm. Serve and enjoy!
Approximate Information for One Serving
Nutrition Disclaimers
Number of total servings shown is approximate. Actual number of servings will depend on your preferred portion sizes.
Nutritional values shown are general guidelines and reflect information for 1 serving using the ingredients listed, not including any optional ingredients. Actual macros may vary slightly depending on specific brands and types of ingredients used.
Did you make this recipe?
Please consider Pinning it!!