Homemade Nutter Butters are a nostalgic treat that replicates the iconic peanut butter sandwich cookies, with a soft, chewy texture and rich peanut flavor. Rooted in American snacking tradition, the original Nutter Butter was introduced by Nabisco in 1969 and quickly became a beloved staple in lunchboxes across the country.
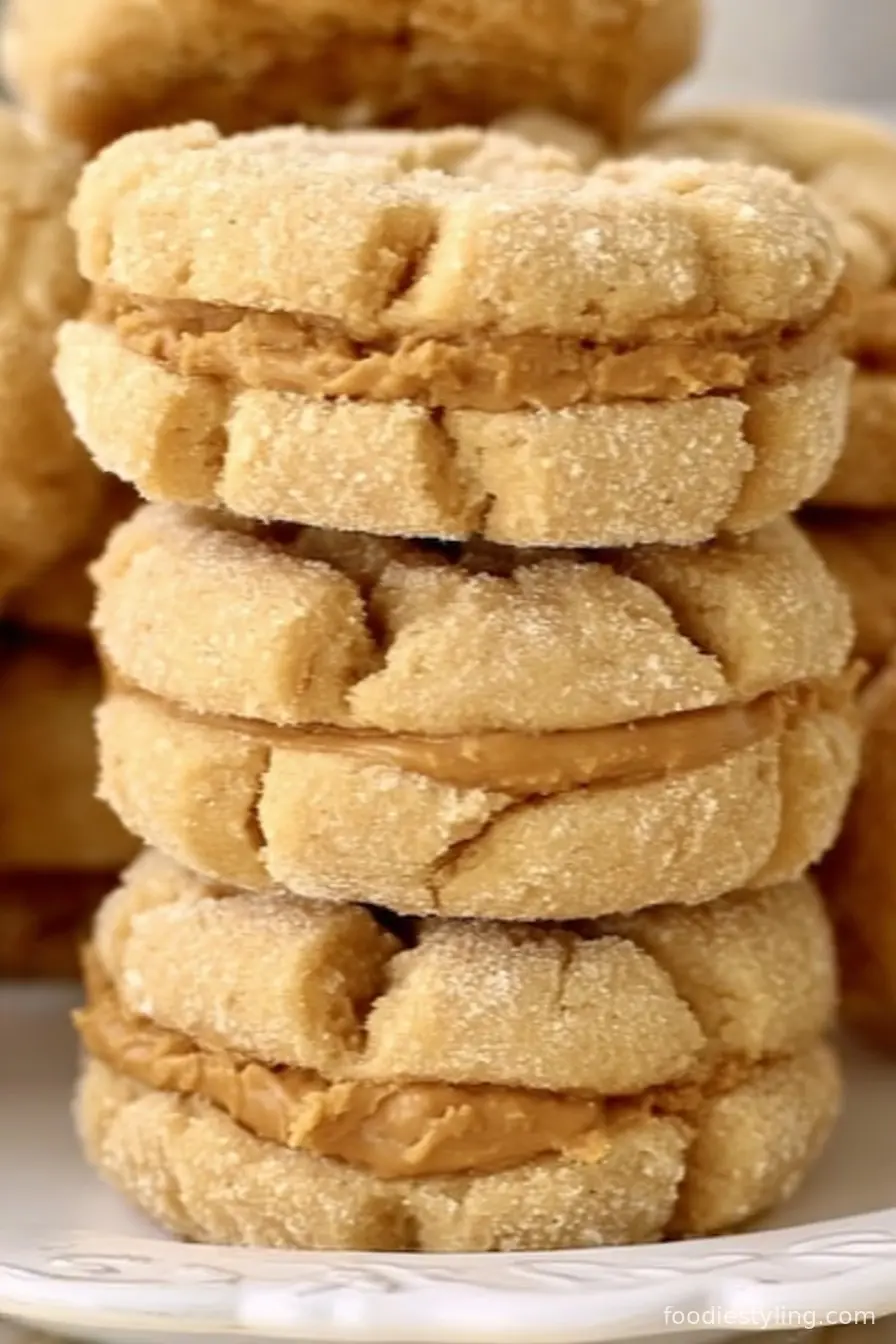
These cookies are characterized by their distinctive peanut shape and a creamy, sweet peanut butter filling nestled between two crisp yet tender cookies. Making Homemade Nutter Butters allows you to customize the flavor and texture, ensuring a fresher and more satisfying experience than store-bought versions.
Not only do homemade versions eliminate preservatives and questionable additives, they also let you control the level of sweetness and choose high-quality ingredients.
Whether you’re looking to relive childhood memories or create new ones for your family, this Homemade Nutter Butters recipe promises a perfect balance of nostalgia and homemade goodness. The instructions will guide you through every detail, from preparing the dough and shaping the cookies to achieving that famous criss-cross finish.
If you love baking, peanut butter, or simply crave a delicious and delightful homemade dessert, these sandwich cookies are the answer. Plus, they make for a charming homemade gift or a standout addition to any cookie platter.
Read on to learn how to make your own batch of Homemade Nutter Butters and bring the joy of this classic cookie into your own kitchen.
Ingredients
- 1 ½ cups all purpose flour
- 1 teaspoon baking soda
- ¼ teaspoon kosher salt
- ½ cup unsalted butter, softened
- 1 cup light brown sugar
- 1 cup creamy peanut butter
- 1 large egg
- ½ teaspoon pure vanilla extract
- ½ cup sugar (to roll the cookie dough in)
- Peanut Butter Filling:
- ¼ cup unsalted butter, softened
- ½ cup creamy peanut butter
- 1 ½ cups powdered sugar
- 2 tablespoons milk
- ¼ teaspoon vanilla extract
Instructions
- Start by preheating your oven to 350°F (175°C) and cover a baking sheet with parchment paper or a silicone baking mat to ensure easy cookie removal and even baking. In a small bowl, pour in the half cup of sugar you’ll use for rolling the cookie dough and set it aside for later.
- In a medium mixing bowl, combine the all-purpose flour, baking soda, and kosher salt. Gently mix these dry ingredients with a whisk or fork to ensure they are evenly distributed, which helps the cookies bake consistently.
- Using a stand mixer or a hand-held electric mixer, beat the softened butter, light brown sugar, and creamy peanut butter together at medium speed. Continue mixing until the mixture is smooth, fluffy, and lighter in color, which can take about 3-4 minutes. Creaming these ingredients incorporates air and creates the basis for a tender cookie.
- Add the egg and pure vanilla extract to the creamed mixture. Blend thoroughly until both ingredients are completely combined, ensuring the dough remains smooth without streaks.
- Gradually add the bowl of dry ingredients to the mixture of wet ingredients. Start on a low speed to avoid flour spilling, and increase to medium until the dough just comes together. Overmixing at this stage can toughen the cookies, so stop as soon as everything is combined.
- Scoop out small portions of dough, each roughly 1 ½ tablespoons in size. Roll each between your palms to form a uniform ball, then gently shape it into a small log or oval to mimic the classic 'peanut' shape.
- Roll each dough log in the reserved bowl of granulated sugar, ensuring the entire surface is coated. This creates a sweet, subtle crunch on the finished cookies.
- Place each sugared log onto your prepared baking sheet, leaving at least 2 inches of space between them to allow for spreading during baking. Proper spacing ensures the cookies don’t stick together.
- Take a fork and gently imprint a criss-cross pattern onto each dough log, pressing lightly but firmly. To complete the peanut shell effect, lightly pinch the center of each log so the ends become slightly bulbous, forming the signature peanut shape.
- Bake the cookies in your preheated oven for 10 to 12 minutes, watching for a light golden-brown color around the edges while the centers remain soft. This careful baking ensures a chewy texture instead of a hard, crunchy one.
- Once baked, let the cookies rest on the baking sheet for about five minutes before transferring them to a wire rack. This allows them to firm up and finish cooking with residual heat, reducing the risk of breakage.
- Allow the cookies to cool completely on the wire rack before moving on to the filling, which prevents the creamy layer from melting too quickly and seeping out the sides.
- For the peanut butter filling, place the softened butter and creamy peanut butter into the bowl of a stand mixer or use a hand mixer. Beat on medium speed until the mixture becomes fluffy and lighter in texture.
- Gradually add the powdered sugar to the whipped mixture, then pour in the milk and vanilla extract. Beat everything together until you have a smooth, creamy, and easily spreadable filling. Add more milk, a teaspoon at a time, if you prefer a softer texture.
- Pair up your cooled cookies according to size. Place about one tablespoon of the peanut butter filling onto the flat side (bottom) of one cookie for each pair, spreading it almost to the edges for full coverage.
- Complete each sandwich by placing a second cookie on top of the filling, matching the shapes as best as possible. Gently press so that the filling reaches just to the edges without spilling over. Your Homemade Nutter Butters are now ready to enjoy!
Nutritional Information
Homemade Nutter Butters are a delicious treat, but it’s always helpful to be aware of their nutritional profile, especially if you’re mindful of your daily intake.
Since these sandwich cookies are peanut butter-based, they offer a source of plant-based protein as well as healthy monounsaturated fats from both the peanut butter and butter used in the recipe.
A typical sandwich cookie made with the ingredient quantities provided will be around 200-220 calories, with about 10-12 grams of fat, 26-30 grams of carbohydrates, 14-16 grams of sugar, 3-4 grams of protein, and a small amount of dietary fiber per serving.
They also contain modest levels of vitamins and minerals such as Vitamin E, magnesium, and potassium, thanks to the peanut butter. However, because of their sugar and butter content, they should be enjoyed in moderation, especially for those managing caloric intake or specific dietary needs.
You can adjust the cookie size to create smaller portions, effectively controlling the caloric contribution per cookie. Remember, these cookies are meant as a sweet occasional indulgence, offering moments of comfort and delight, balanced as part of a varied diet.
Wine and Beverage Pairings
Homemade Nutter Butters pair exceptionally well with classic beverages such as a cold glass of milk, which helps balance their richness and enhances the peanut butter flavor.
For adults looking for a more sophisticated pairing, try serving these cookies with a light dessert wine such as Moscato d’Asti or a sweet sherry—both will complement the cookie’s sweetness and creamy center.
Hot coffee or a robust black tea are also excellent choices, providing a slightly bitter contrast to the sweet, nutty sandwich cookies.
If you’re serving children or want a caffeine-free treat, a vanilla-flavored almond milk or hot cocoa makes a delightful companion, rounding out the nostalgic comfort of this homemade dessert.
Cooking Tips and Variations
When making Homemade Nutter Butters, precision and patience lead to the best results. Use room-temperature butter and peanut butter for smooth, lump-free dough and filling.
For extra peanut flavor, you could lightly toast the flour in a dry pan before mixing, or opt for natural peanut butter (just make sure it’s well-stirred and not too oily).
If you want a crunchier texture, try using chunky peanut butter or adding a small handful of chopped roasted peanuts into the dough. When shaping the dough into the classic peanut shape, don’t worry about making them identical—homemade charm comes from small imperfections!
If you prefer less sugar on the cookie exterior, you can lightly roll them or simply skip the sugar rolling step, but keep in mind this alters the traditional crunch and appearance. For chocolate lovers, consider drizzling or dipping half of each sandwich in melted chocolate for a decadent twist.
If you have peanut allergies in your household, you could experiment with almond butter or sunflower seed butter for a nut-free adaptation—the taste will differ but still be delicious. Lastly, ensure your cookies are fully cooled before assembling to prevent a melty mess.
Store assembled cookies in an airtight container at room temperature for up to five days, or freeze for longer-term storage.

Serving Suggestions
Homemade Nutter Butters shine as a centerpiece on dessert platters, snack trays at parties, or even as a personal treat alongside your afternoon beverage break.
For special occasions, resurface their classic appeal by arranging them in rows on a platter, or by stacking them in clear glass jars for a charming, rustic look.
These cookies also make thoughtful gifts; simply stack several in wax paper and secure them in a decorative tin or cellophane bag tied with ribbon.
If you’re hosting a children’s birthday party or a family get-together, consider involving kids in the assembly process—spreading the filling and pressing the cookies together is a fun, hands-on activity.
For a creative twist, serve the Homemade Nutter Butters with a scoop of vanilla or peanut butter ice cream, or crumble them over a bowl of fresh fruit and yogurt for a playful dessert.
Their unique peanut shape and classic criss-cross design make them instantly recognizable, bringing smiles and sparking conversations wherever they’re served. Whether enjoyed warm from the oven or packed for travel, Homemade Nutter Butters deliver joy and homemade comfort in every bite.
Health Benefits
Despite being a decadent treat, Homemade Nutter Butters offer some nutritional benefits thanks to the use of peanut butter, which is a solid source of plant-based protein, dietary fiber, and heart-healthy fats.
Peanut butter also contains essential vitamins and minerals such as vitamin E, niacin, magnesium, and phosphorus, making it more nutritious than many other dessert options.
By making Nutter Butters at home, you have the added advantage of controlling ingredient quality—opting for natural, preservative-free peanut butter and using less processed sugars, if you choose.
However, it's important to remember that these cookies are still quite high in sugar and saturated fats due to the butter and sugar content, so moderation is key.
For those who require alternative diets, you can substitute dairy-free butter and plant-based milks in both the cookies and filling, helping you accommodate vegan or lactose-sensitive guests.
Eating these cookies as an occasional treat, particularly when paired with nutrient-rich add-ons like fruit, allows you to enjoy Homemade Nutter Butters within a broader, more balanced diet.
Frequently Asked Questions
Absolutely. Natural peanut butter works well, but ensure it’s thoroughly stirred and not too oily, as excess oil can change the texture of both cookie and filling. Chunky peanut butter can be used for added texture and crunch, giving a delightful variation to the Homemade Nutter Butters.
Store the finished cookies in an airtight container at room temperature for up to five days. For longer storage, you can freeze them (either filled or unfilled) in a flat layer with parchment between layers, then thaw at room temperature when ready to eat.
Yes, both the cookie dough and the peanut butter filling can be made a day in advance. Wrap the dough tightly and refrigerate until ready to shape and bake. Store the filling in an airtight container in the fridge and allow it to soften at room temperature before assembling the cookies.
As written, this recipe is not suitable for those with peanut allergies. However, you can substitute with almond butter or sunflower seed butter as an alternative, though it will result in a different taste profile.
You can slightly reduce the sugar in both the cookie dough and filling if you prefer a less sweet treat. However, too much reduction may affect texture and taste. Try reducing by 10-15% and see how you like the results before decreasing further.
Homemade Nutter Butters are a delightful, nostalgic treat that reproduce the flavor and joy of the classic peanut butter sandwich cookie right in your own kitchen. The process is straightforward, approachable, and rewarding, filling your home with rich, peanutty aromas and delivering cookies that are tender, creamy, and visually charming. Whether you’re making them for family gatherings, holiday platters, or simply for a comforting homemade dessert, these cookies are sure to impress and satisfy. With the ability to customize ingredients and control quality, homemade versions elevate the classic Nutter Butter into something even more special. Try this recipe for yourself and rediscover the simple pleasure of homemade cookies—one delicious bite at a time.
Ingredients
- 1 ½ cups all purpose flour
- 1 teaspoon baking soda
- ¼ teaspoon kosher salt
- ½ cup unsalted butter, softened
- 1 cup light brown sugar
- 1 cup creamy peanut butter
- 1 large egg
- ½ teaspoon pure vanilla extract
- ½ cup sugar (to roll the cookie dough in)
- Peanut Butter Filling:
- ¼ cup unsalted butter, softened
- ½ cup creamy peanut butter
- 1 ½ cups powdered sugar
- 2 tablespoons milk
- ¼ teaspoon vanilla extract
Instructions
-
1Start by preheating your oven to 350°F (175°C) and cover a baking sheet with parchment paper or a silicone baking mat to ensure easy cookie removal and even baking. In a small bowl, pour in the half cup of sugar you’ll use for rolling the cookie dough and set it aside for later.
-
2In a medium mixing bowl, combine the all-purpose flour, baking soda, and kosher salt. Gently mix these dry ingredients with a whisk or fork to ensure they are evenly distributed, which helps the cookies bake consistently.
-
3Using a stand mixer or a hand-held electric mixer, beat the softened butter, light brown sugar, and creamy peanut butter together at medium speed. Continue mixing until the mixture is smooth, fluffy, and lighter in color, which can take about 3-4 minutes. Creaming these ingredients incorporates air and creates the basis for a tender cookie.
-
4Add the egg and pure vanilla extract to the creamed mixture. Blend thoroughly until both ingredients are completely combined, ensuring the dough remains smooth without streaks.
-
5Gradually add the bowl of dry ingredients to the mixture of wet ingredients. Start on a low speed to avoid flour spilling, and increase to medium until the dough just comes together. Overmixing at this stage can toughen the cookies, so stop as soon as everything is combined.
-
6Scoop out small portions of dough, each roughly 1 ½ tablespoons in size. Roll each between your palms to form a uniform ball, then gently shape it into a small log or oval to mimic the classic 'peanut' shape.
-
7Roll each dough log in the reserved bowl of granulated sugar, ensuring the entire surface is coated. This creates a sweet, subtle crunch on the finished cookies.
-
8Place each sugared log onto your prepared baking sheet, leaving at least 2 inches of space between them to allow for spreading during baking. Proper spacing ensures the cookies don’t stick together.
-
9Take a fork and gently imprint a criss-cross pattern onto each dough log, pressing lightly but firmly. To complete the peanut shell effect, lightly pinch the center of each log so the ends become slightly bulbous, forming the signature peanut shape.
-
10Bake the cookies in your preheated oven for 10 to 12 minutes, watching for a light golden-brown color around the edges while the centers remain soft. This careful baking ensures a chewy texture instead of a hard, crunchy one.
-
11Once baked, let the cookies rest on the baking sheet for about five minutes before transferring them to a wire rack. This allows them to firm up and finish cooking with residual heat, reducing the risk of breakage.
-
12Allow the cookies to cool completely on the wire rack before moving on to the filling, which prevents the creamy layer from melting too quickly and seeping out the sides.
-
13For the peanut butter filling, place the softened butter and creamy peanut butter into the bowl of a stand mixer or use a hand mixer. Beat on medium speed until the mixture becomes fluffy and lighter in texture.
-
14Gradually add the powdered sugar to the whipped mixture, then pour in the milk and vanilla extract. Beat everything together until you have a smooth, creamy, and easily spreadable filling. Add more milk, a teaspoon at a time, if you prefer a softer texture.
-
15Pair up your cooled cookies according to size. Place about one tablespoon of the peanut butter filling onto the flat side (bottom) of one cookie for each pair, spreading it almost to the edges for full coverage.
-
16Complete each sandwich by placing a second cookie on top of the filling, matching the shapes as best as possible. Gently press so that the filling reaches just to the edges without spilling over. Your Homemade Nutter Butters are now ready to enjoy!
Approximate Information for One Serving
Nutrition Disclaimers
Number of total servings shown is approximate. Actual number of servings will depend on your preferred portion sizes.
Nutritional values shown are general guidelines and reflect information for 1 serving using the ingredients listed, not including any optional ingredients. Actual macros may vary slightly depending on specific brands and types of ingredients used.
To determine the weight of one serving, prepare the recipe as instructed. Weigh the finished recipe, then divide the weight of the finished recipe (not including the weight of the container the food is in) by the desired number of servings. Result will be the weight of one serving.
Did you make this recipe?
Please consider Pinning it!