The Lemon Curd Cheesecake is the perfect fusion of creamy richness and vibrant citrus flavor, bringing a tangy twist to the traditional cheesecake. Cheesecake, with its origins tracing back to Ancient Greece and later popularized in America, has always been a favorite for dessert lovers.
Over the years, variations of cheesecake have appeared, with bakers experimenting with everything from fruit compotes to chocolate drizzles. However, the combination of zesty lemon curd and luscious cream cheese takes this dessert to a whole new level. Why choose Lemon Curd Cheesecake?
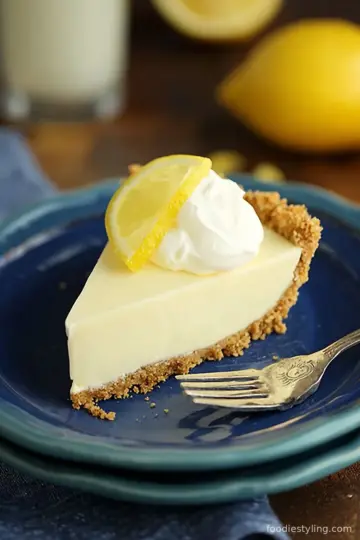
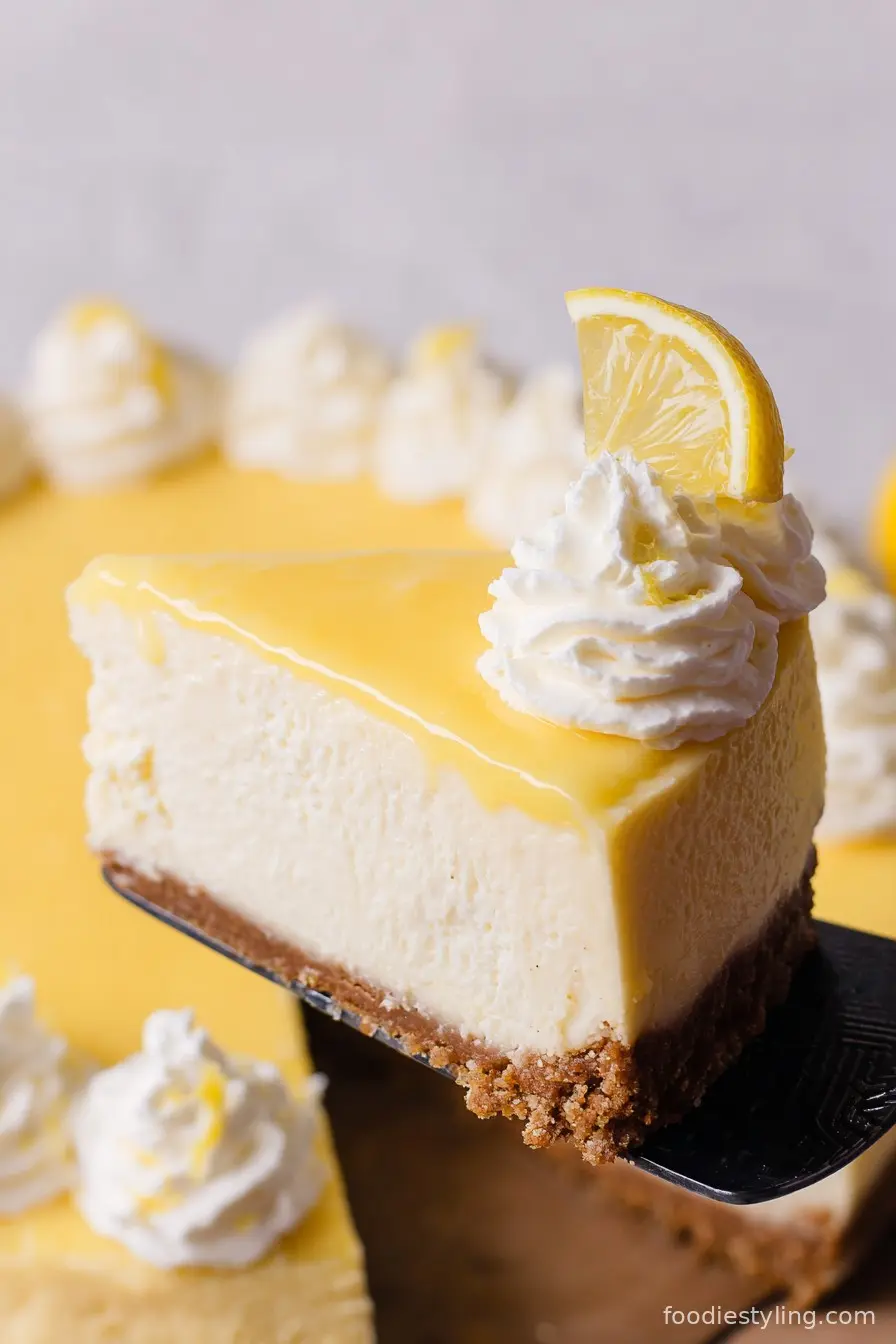
The answer lies in its enchanting balance of textures and flavors. The crunchy graham cracker crust serves as a reliable base, giving way to an irresistibly smooth and velvety cheesecake filling.
The lemon curd topping, made with real lemon juice and zest, adds a bright, refreshing note that tantalizes your taste buds and leaves you craving more. As you carve out a slice, every layer reveals attention to detail and flavor harmony.
This Lemon Curd Cheesecake recipe is a show-stopping centerpiece for any occasion, from holiday feasts and summer picnics to relaxed evening gatherings. Whether you are a seasoned baker or a novice, this detailed recipe makes crafting a bakery-quality dessert achievable at home.
With keywords such as lemon curd, cheesecake, dessert, and easy cheesecake recipes, this article is designed to help you master Lemon Curd Cheesecake, impress guests, and satisfy your sweet cravings with style.
Ingredients
- For the crust:
- 1 ½ cups (150g) graham cracker crumbs
- ¼ cup (50g) granulated sugar
- 6 tablespoons (85g) unsalted butter, melted
- Pinch of salt
- For the cheesecake filling:
- 3 (8-ounce) packages (680g) cream cheese, softened
- 1 cup (200g) granulated sugar
- 3 large eggs, room temperature
- ¼ cup (60ml) sour cream
- 2 teaspoons pure vanilla extract
- Zest of 1 lemon
- For the lemon curd topping:
- 3 large egg yolks
- 1 large egg
- ½ cup (100g) granulated sugar
- ½ cup (120ml) freshly squeezed lemon juice
- 2 teaspoons finely grated lemon zest
- 4 tablespoons (55g) unsalted butter, cut into cubes
- Pinch of salt
- Optional garnish:
- Whipped cream
- Fresh lemon slices
- Fresh berries (blueberries or raspberries)
- Mint leaves
Instructions
- Begin by setting your oven to 350°F (175°C). Prepare a 9-inch (23cm) springform pan by lightly greasing it and lining the base with parchment paper. This step ensures the cheesecake releases easily later.
- In a medium-sized bowl, stir together the graham cracker crumbs, granulated sugar, melted butter, and a small pinch of salt until the mixture is evenly combined and looks like damp sand.
- Pour the crumb mixture into your prepared pan. Using the back of a measuring cup or a flat-bottomed glass, press the crumbs firmly and evenly onto the bottom to form a compact crust. Slide the pan into the oven and bake for about 10 minutes. Once golden and fragrant, take it out and let it cool while you focus on the filling.
- Reduce your oven temperature to 325°F (163°C) to prepare for the cheesecake. In a large mixing bowl, beat the softened cream cheese until it is luxuriously smooth and free from any lumps, pausing to scrape down the bowl as needed.
- Gradually add in the granulated sugar, mixing thoroughly so it incorporates smoothly. Now, add the eggs one at a time, beating just long enough for each to blend in—which helps maintain a creamy texture and avoids introducing too much air.
- Stir in the sour cream, vanilla extract, and the zest of a fresh lemon. Mix until the batter is completely smooth and glossy, taking care not to overbeat, which could introduce air and lead to cracks during baking.
- Pour the creamy cheesecake batter over the now-cooled crust, using a spatula to spread it into an even layer and smooth the surface. Make sure it’s evenly distributed to ensure uniform baking.
- Place your filled springform pan inside a larger roasting pan. Gently pour hot water into the roasting pan, filling it until the water reaches halfway up the side of your springform pan. This water bath creates gentle, even heat and helps keep the cheesecake from cracking.
- Bake the cheesecake for 55 to 65 minutes. It’s done when the edges are set and the center still jiggles slightly—this ensures a creamy interior. Once ready, turn off the oven, crack open the oven door, and allow the cheesecake to cool inside for an hour; this gradual cooling helps prevent cracks.
- Carefully remove the cheesecake from the oven and the water bath. Run a thin knife around the edge to prevent sticking. Allow it to cool to room temperature, then cover and refrigerate for at least 4 hours or, for best results, overnight.
- While the cheesecake sets, prepare your lemon curd. In a medium saucepan, whisk together the egg yolks, whole egg, sugar, freshly squeezed lemon juice, lemon zest, and a pinch of salt until smooth and uniform.
- Place the saucepan over medium-low heat. Stir constantly using a wooden spoon or heatproof spatula until the curd thickens and can coat the back of the spoon, which will take 8 to 10 minutes. Avoid letting the mixture boil, as overheating can scramble the eggs.
- Remove the saucepan from the heat and stir in the butter cubes gradually, mixing until each piece fully melts and the curd looks silky. For an ultra-smooth result, pass the lemon curd through a fine mesh sieve to catch any small bits of egg or zest.
- Let the lemon curd cool to room temperature, then cover the bowl and refrigerate until it’s needed as your cheesecake topping.
- Once your cheesecake has thoroughly chilled and set, pour the prepared lemon curd on top. Use an offset spatula to delicately spread it into a smooth, even layer that covers the entire cheesecake.
- Return the cheesecake to the refrigerator for at least one hour, giving the lemon curd topping time to firm up for easy slicing and serving.
- Before serving, decorate your Lemon Curd Cheesecake with dollops of whipped cream, crisp lemon slices, a handful of fresh blueberries or raspberries, and a few mint leaves as you desire. For neat slices, use a sharp knife dipped in warm water, wiping it clean between cuts.
Nutritional Information
A typical slice of Lemon Curd Cheesecake is rich, indulgent, and contains a balance of carbohydrates, fats, and protein. On average, one slice (assuming 12 servings per cheesecake) delivers approximately 420 to 480 calories, with about 28 grams of fat, 35 grams of carbohydrates, and 7 grams of protein.
The cream cheese and butter contribute to the saturated fat content, while the eggs offer both protein and essential nutrients like Vitamin B12 and choline. The graham cracker crust provides some fiber, and the lemon juice and zest enrich the dessert with vitamin C and antioxidants, brightening each bite.
However, Lemon Curd Cheesecake is still a dessert best enjoyed in moderation due to its sugar and calorie content. If you are watching your calorie intake, consider serving smaller portions.
For those with specific nutritional needs, this cheesecake can be adapted with low-fat cream cheese or sugar alternatives, although the texture and flavor may vary.
Whether served alone or with fresh berries for added fiber and phytonutrients, this treat offers a delightful finale to a well-rounded meal, making it a dessert to savor mindfully.

Wine and Beverage Pairings
Lemon Curd Cheesecake pairs exceptionally well with a range of beverages. For wine lovers, a bright, sweet Riesling or Moscato complements the tang of the lemon curd while balancing the cheesecake’s richness. Sparkling wines, like Prosecco or Champagne, work wonders by cutting through the creaminess and refreshing the palate.
If you prefer non-alcoholic options, consider a freshly brewed cup of Earl Grey or green tea, which enhances the citrus notes. For coffee enthusiasts, a shot of espresso or a cappuccino adds a pleasantly bitter contrast that heightens the cheesecake’s sweetness.
To round things out, serve lemon-infused sparkling water for a light, zesty sip that echoes the dessert’s citrus profile.
Cooking Tips and Variations
To achieve the perfect Lemon Curd Cheesecake, there are a few essential baking tricks you should keep in mind. Always begin with room-temperature cream cheese, eggs, and sour cream, as this ensures a lusciously smooth and lump-free batter.
If any of your dairy products are too cold, they may create a grainy texture or leave pockets of unmixed ingredients.
The use of a water bath is another key aspect; enveloping the springform pan with foil before placing it in the roasting pan can safeguard against leaks, ensuring a crisp crust and creamy fill.
Baking cheesecake slowly at a lower temperature prevents overcooking and reduces the risk of cracks in the surface. If you prefer a lighter taste, you can substitute a portion of the cream cheese with Greek yogurt, although this will slightly alter the consistency.
For a gluten-free crust, swap the graham crackers with gluten-free cookies. While the classic lemon curd is unbeatable, you might experiment with orange or lime for a different citrus twist. Topping the cheesecake with toasted coconut or a fruit compote can add visual appeal and flavor complexity.
Finally, patience is key; allow the cheesecake to cool and refrigerate thoroughly so each layer sets beautifully. Remember, neat presentation is easy when you use a hot, cleaned knife for slicing.

Serving Suggestions
Presenting Lemon Curd Cheesecake is an act of artistry, as much as it is a culinary delight.
For celebrations, arrange the cheesecake on a decorative cake stand and garnish just before serving with generous swirls of whipped cream around the edges, fresh lemon slices fanned gracefully, and plump blueberries or raspberries scattered for color contrast.
Mint leaves offer a touch of green, making the yellow curd and berry accents pop. For an elegant dinner party, pre-slice the cheesecake to ensure clean, professional-looking portions, wiping your knife with warm water between cuts.
Each slice can be plated individually with a few extra berries and a light dusting of powdered sugar. To complement the rich tang of the dessert, serve alongside a glass of your chosen beverage, encouraging guests to savor every bite.
This show-stopping dessert is ideal for summer picnics, holiday tables, or even as an indulgent treat on an ordinary afternoon.
The vibrant colors and delightful aroma of Lemon Curd Cheesecake invite guests to dig in, and the balance of creamy, sweet, and tangy flavors ensures it will be the highlight of any occasion.
Health Benefits
While Lemon Curd Cheesecake is an indulgent dessert, it contains a few redeeming health qualities. Citrus fruits like lemon are packed with vitamin C, which provides antioxidant benefits, supports the immune system, and promotes collagen production necessary for healthy skin.
Eggs in the filling and topping deliver protein, essential for muscle repair, as well as nutrients such as selenium and choline. The cheesecake’s dairy components, primarily cream cheese and sour cream, offer calcium for bone strength. Berries often used as a garnish contain vitamins, fiber, and valuable phytochemicals.
However, this dessert is high in sugar and saturated fat, so portion control is key for those managing cholesterol or blood sugar levels. For a lighter version, consider low-fat dairy alternatives or natural sweeteners, though the taste and mouthfeel will change.
As an occasional treat, Lemon Curd Cheesecake can be part of a balanced diet, especially when enjoyed alongside fresh fruit and within a nutrient-rich meal plan.
Frequently Asked Questions
Absolutely! Lemon Curd Cheesecake is ideal for making in advance. Prepare the cheesecake a day before serving and chill overnight. The lemon curd topping can be added a few hours before serving. This allows flavors to develop and ensures a perfect set.
To avoid cracks, do not overmix the batter and always bake your cheesecake in a water bath. Gradual cooling is vital—leave the cheesecake in the oven with the door cracked post-baking to reduce sudden temperature changes. Running a knife around the edge after baking also helps prevent cracks.
Yes, you can freeze the plain cheesecake (without the lemon curd) for up to two months. Wrap tightly in plastic and foil. Thaw overnight in the refrigerator before adding the lemon curd topping and serving.
Popular garnish options include swirls of whipped cream, fresh lemon slices, mixed berries like blueberries or raspberries, and sprigs of mint for a pop of color and refreshing taste.
You can decrease the sugar slightly or use a sugar substitute, but this may alter texture and taste. It is important to keep adequate sugar in the lemon curd for proper setting and flavor balance.
Lemon Curd Cheesecake stands apart as a vibrant, flavorful, and visually stunning dessert that captures the essence of both creaminess and citrus brilliance. With its crumbly graham cracker base, silky cheesecake filling, and tangy lemon curd crown, it is designed to impress and delight at any gathering. By following detailed, step-by-step instructions and incorporating helpful tips, anyone can produce this bakery-worthy treat right at home. Whether enjoyed on a festive occasion or as a special reward, Lemon Curd Cheesecake promises to be a memorable centerpiece. Embrace the balance of sweet and tart, and share this remarkable dessert with friends and family for an experience that is as joyful as it is delicious.
Ingredients
- For the crust:
- 1 ½ cups (150g) graham cracker crumbs
- ¼ cup (50g) granulated sugar
- 6 tablespoons (85g) unsalted butter, melted
- Pinch of salt
- For the cheesecake filling:
- 3 (8-ounce) packages (680g) cream cheese, softened
- 1 cup (200g) granulated sugar
- 3 large eggs, room temperature
- ¼ cup (60ml) sour cream
- 2 teaspoons pure vanilla extract
- Zest of 1 lemon
- For the lemon curd topping:
- 3 large egg yolks
- 1 large egg
- ½ cup (100g) granulated sugar
- ½ cup (120ml) freshly squeezed lemon juice
- 2 teaspoons finely grated lemon zest
- 4 tablespoons (55g) unsalted butter, cut into cubes
- Pinch of salt
- Optional garnish:
- Whipped cream
- Fresh lemon slices
- Fresh berries (blueberries or raspberries)
- Mint leaves
Instructions
-
1Begin by setting your oven to 350°F (175°C). Prepare a 9-inch (23cm) springform pan by lightly greasing it and lining the base with parchment paper. This step ensures the cheesecake releases easily later.
-
2In a medium-sized bowl, stir together the graham cracker crumbs, granulated sugar, melted butter, and a small pinch of salt until the mixture is evenly combined and looks like damp sand.
-
3Pour the crumb mixture into your prepared pan. Using the back of a measuring cup or a flat-bottomed glass, press the crumbs firmly and evenly onto the bottom to form a compact crust. Slide the pan into the oven and bake for about 10 minutes. Once golden and fragrant, take it out and let it cool while you focus on the filling.
-
4Reduce your oven temperature to 325°F (163°C) to prepare for the cheesecake. In a large mixing bowl, beat the softened cream cheese until it is luxuriously smooth and free from any lumps, pausing to scrape down the bowl as needed.
-
5Gradually add in the granulated sugar, mixing thoroughly so it incorporates smoothly. Now, add the eggs one at a time, beating just long enough for each to blend in—which helps maintain a creamy texture and avoids introducing too much air.
-
6Stir in the sour cream, vanilla extract, and the zest of a fresh lemon. Mix until the batter is completely smooth and glossy, taking care not to overbeat, which could introduce air and lead to cracks during baking.
-
7Pour the creamy cheesecake batter over the now-cooled crust, using a spatula to spread it into an even layer and smooth the surface. Make sure it’s evenly distributed to ensure uniform baking.
-
8Place your filled springform pan inside a larger roasting pan. Gently pour hot water into the roasting pan, filling it until the water reaches halfway up the side of your springform pan. This water bath creates gentle, even heat and helps keep the cheesecake from cracking.
-
9Bake the cheesecake for 55 to 65 minutes. It’s done when the edges are set and the center still jiggles slightly—this ensures a creamy interior. Once ready, turn off the oven, crack open the oven door, and allow the cheesecake to cool inside for an hour; this gradual cooling helps prevent cracks.
-
10Carefully remove the cheesecake from the oven and the water bath. Run a thin knife around the edge to prevent sticking. Allow it to cool to room temperature, then cover and refrigerate for at least 4 hours or, for best results, overnight.
-
11While the cheesecake sets, prepare your lemon curd. In a medium saucepan, whisk together the egg yolks, whole egg, sugar, freshly squeezed lemon juice, lemon zest, and a pinch of salt until smooth and uniform.
-
12Place the saucepan over medium-low heat. Stir constantly using a wooden spoon or heatproof spatula until the curd thickens and can coat the back of the spoon, which will take 8 to 10 minutes. Avoid letting the mixture boil, as overheating can scramble the eggs.
-
13Remove the saucepan from the heat and stir in the butter cubes gradually, mixing until each piece fully melts and the curd looks silky. For an ultra-smooth result, pass the lemon curd through a fine mesh sieve to catch any small bits of egg or zest.
-
14Let the lemon curd cool to room temperature, then cover the bowl and refrigerate until it’s needed as your cheesecake topping.
-
15Once your cheesecake has thoroughly chilled and set, pour the prepared lemon curd on top. Use an offset spatula to delicately spread it into a smooth, even layer that covers the entire cheesecake.
-
16Return the cheesecake to the refrigerator for at least one hour, giving the lemon curd topping time to firm up for easy slicing and serving.
-
17Before serving, decorate your Lemon Curd Cheesecake with dollops of whipped cream, crisp lemon slices, a handful of fresh blueberries or raspberries, and a few mint leaves as you desire. For neat slices, use a sharp knife dipped in warm water, wiping it clean between cuts.
Approximate Information for One Serving
Nutrition Disclaimers
Number of total servings shown is approximate. Actual number of servings will depend on your preferred portion sizes.
Nutritional values shown are general guidelines and reflect information for 1 serving using the ingredients listed, not including any optional ingredients. Actual macros may vary slightly depending on specific brands and types of ingredients used.
To determine the weight of one serving, prepare the recipe as instructed. Weigh the finished recipe, then divide the weight of the finished recipe (not including the weight of the container the food is in) by the desired number of servings. Result will be the weight of one serving.
Did you make this recipe?
Please consider Pinning it!