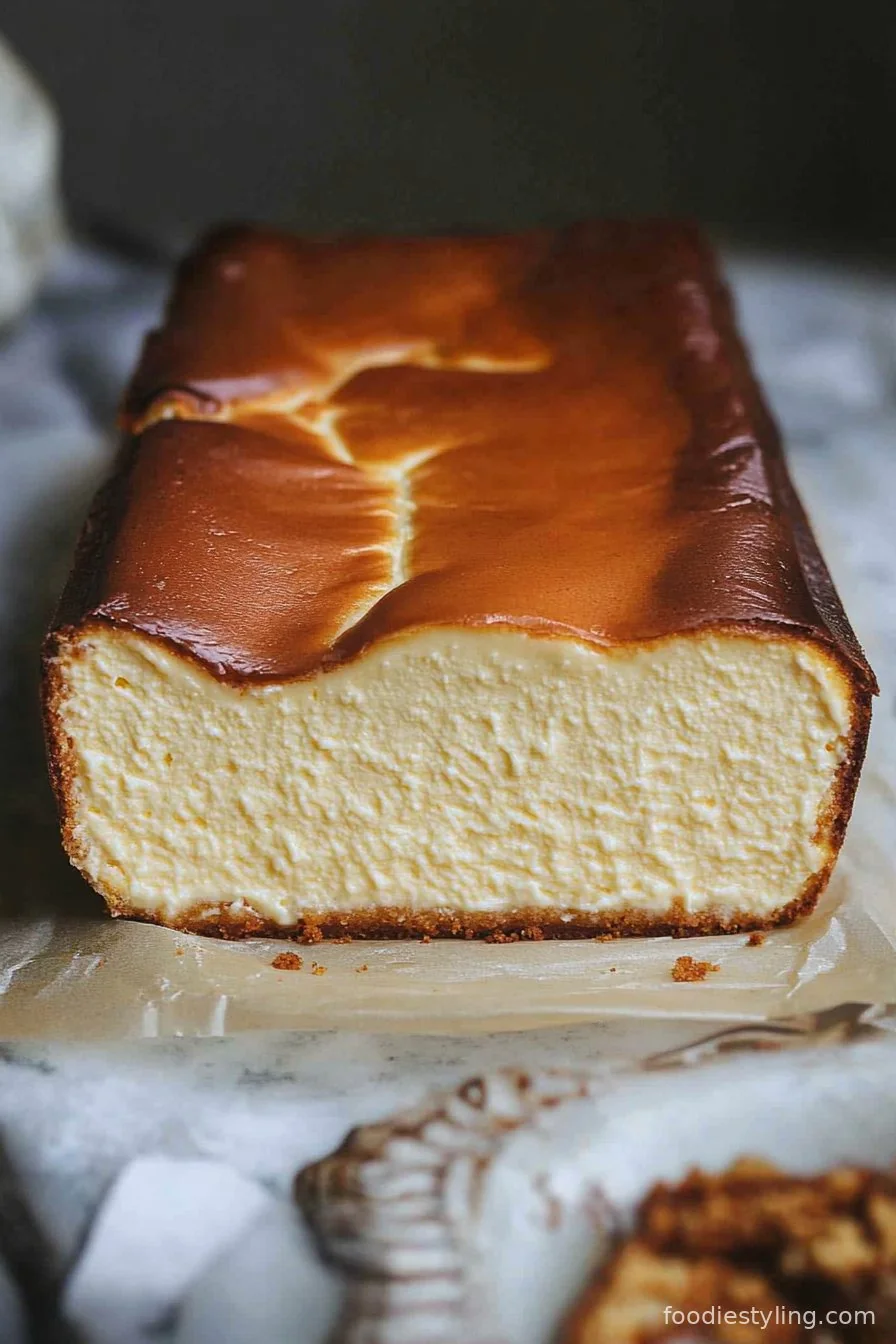
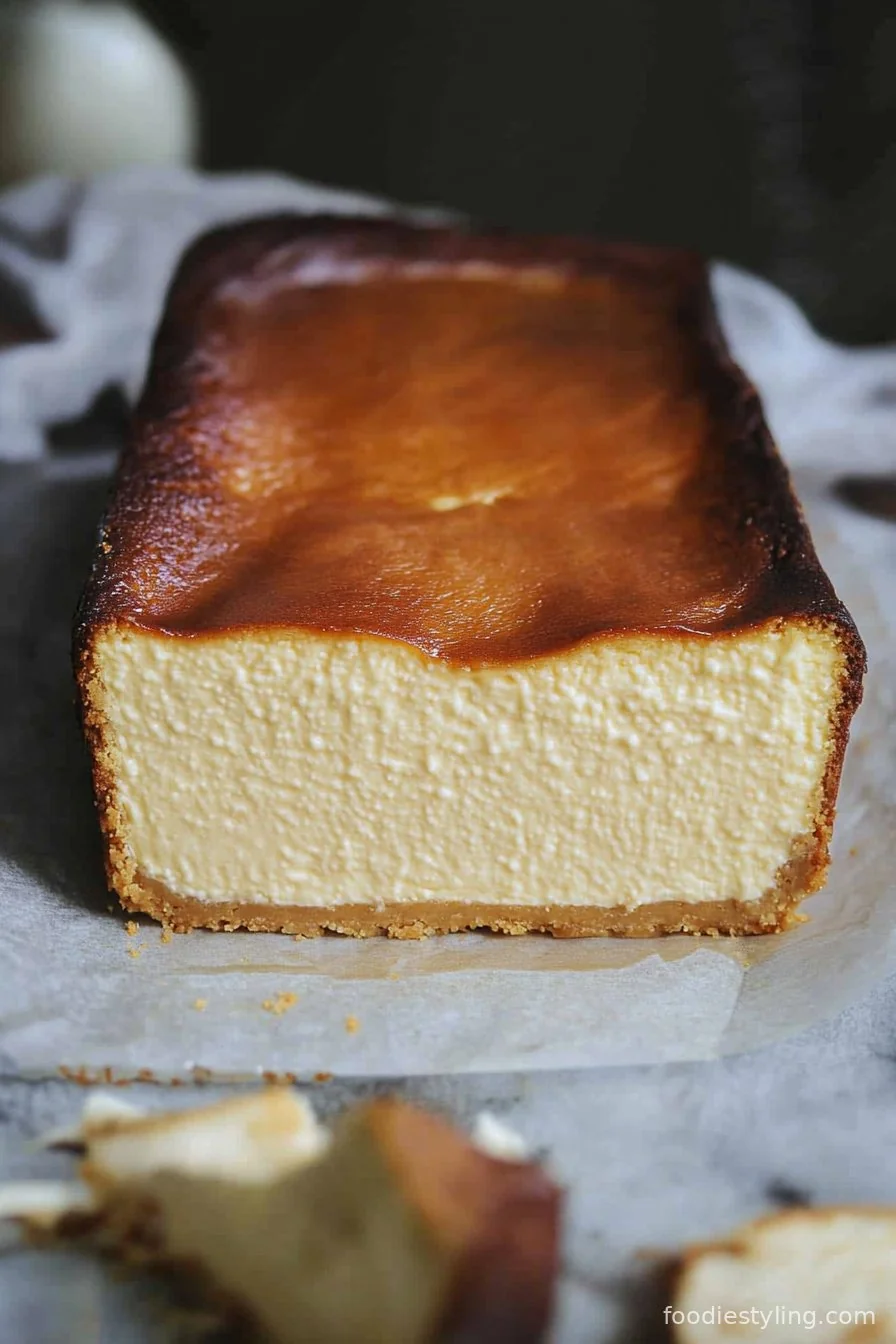
If you've ever dreamed of making a show-stopping cheesecake with zero fuss and all the flavor, this Loaf Pan Basque Cheesecake is the answer! With its deeply caramelized top, impossibly creamy center, and signature crustless finish, every bite is utterly decadent.
The best part? It comes together with just a handful of basic ingredients and bakes up beautifully in a standard loaf panâ€â€no springform or water bath needed! It's perfect for a spontaneous dessert craving or cozy dinner parties with friends.
Inspired by the beloved Basque cheesecake of San Sebastián, this version is scaled down for smaller gatherings and delivers big on rich, custardy satisfaction. It's truly a must-try for any cheesecake lover (or anyone wanting to impress with minimal effort!).
So grab your loaf pan and get ready for a slice of creamy, caramelized blissâ€â€this recipe is destined to become your new favorite!
Why You'll Love This Recipe
- Incredibly easy and beginner-friendlyâ€â€just mix, pour, and bake!
- No crust or water bath required, which means less prep and cleanup
- Delivers a uniquely caramelized, deeply flavorful top with a dreamy creamy center
- Perfectly portioned for small gatherings, family dinners, or as an indulgent weeknight treat
Key Ingredients for Loaf Pan Basque Cheesecake
See recipe card below for full list of measurements, ingredients, and instructions.Cream Cheese
This is the star ingredient that gives the cheesecake its signature luscious, tangy richness. Make sure it’s softened to room temperature so it blends smoothly, preventing any lumps. Full-fat cream cheese is best for maximum creaminess, but you can use light cream cheese for a slightly lighter resultâ€â€just know it won’t be quite as rich.
Heavy Cream
Heavy cream ensures the filling is silky smooth and luxuriously creamy. For the best texture, use cold heavy cream straight from the fridge. If you only have half-and-half, you can substitute it, but your cheesecake may turn out a bit less decadent.
Eggs
Eggs are essential for binding the ingredients and creating that classic custardy texture. Use large eggs at room temperatureâ€â€this helps everything combine evenly. If you want to experiment, you can swap in one whole egg plus an extra yolk for an even richer bite.
Granulated Sugar
Sugar sweetens the cheesecake and aids in the caramelization of the top. Regular white granulated sugar is perfect here, but you could use superfine sugar for an even silkier texture. You can also play around with light brown sugar for a subtle molasses note.
Vanilla Extract
Vanilla extract adds warmth and rounds out the flavors, making the cheesecake taste bakery-worthy. Pure vanilla extract is best, but you can use vanilla bean paste for a more intense vanilla flavor or leave it out for a more traditional Basque recipe.
Instructions for Loaf Pan Basque Cheesecake
See recipe card below for full list of measurements, ingredients, and instructions.Prepare the Pan and Oven
Preheat your oven to 425 °F (220 °C). Line a 9x5-inch loaf pan with two sheets of parchment paper, leaving some overhang on all sides. This makes unmolding super easy and ensures the cheesecake won’t stick!
Beat Cream Cheese and Sugar
Place the softened cream cheese and sugar in a large mixing bowl. Using a hand mixer (or stand mixer with the paddle), beat until very smooth and creamy, about 2 minutes. Scrape down the bowl as neededâ€â€no lumps allowed!
Add Eggs One at a Time
Beat in the eggs, one at a time, mixing well after each. This helps create that ultra-smooth custard. Don’t rushâ€â€fully incorporating each egg makes a difference!
Mix in Cream, Vanilla, and Salt
Pour in the heavy cream, vanilla, and salt. Mix on low speed until just combined. You want a silky, pourable batterâ€â€try not to over-mix at this stage.
Sift in Flour
Place a fine-mesh sieve over your bowl and sift in the flour. Gently beat or fold to combine. The flour adds a subtle structure, so your cheesecake is creamy but still sliceable.
Pour and Bake
Pour the batter into your lined loaf pan. Give it a couple of taps on the counter to pop any large bubbles. Bake for 33 to 38 minutes, until the top is deeply caramelized (almost burnt in spots!) and the edges are set, but the center still jiggles when you gently shake the pan.
Cool, Chill, and Serve
Let the cheesecake cool completely at room temperature in the panâ€â€it will deflate a bit, which is perfect. Then refrigerate for at least 2 hours (or up to overnight) for the best texture. Lift out using the parchment, slice, and enjoy that creamy, caramelized magic!
Recipe Variations
Make It Gluten-Free
Swap the all-purpose flour for your favorite 1:1 gluten-free flour blendâ€â€no one will ever know the difference! Or, you can even leave out the flour entirely for a slightly softer, more custardy cheesecake.
Chocolate Swirl Basque Cheesecake
For a chocolatey twist, melt 2 ounces of dark chocolate and swirl it into the batter just before baking. The chocolate ribbons add an extra layer of indulgence!
Citrus Zest Burst
Add the finely grated zest of one lemon or orange to the batter for a bright, fresh flavor that pairs beautifully with the creamy filling.
Mini Loaf Pan Cheesecakes
If you have smaller loaf pans, divide the batter between two mini pans and bake for a shorter time (start checking at 22 minutes). Perfect for individual servings or gifting!
Dairy-Free Version
Use dairy-free cream cheese and coconut cream instead of heavy cream. The result is still rich and creamy with a subtle coconut note.
Serving Suggestions
Serve your Loaf Pan Basque Cheesecake chilled or at cool room temperature, sliced thick for maximum creaminess. It’s delicious on its own, but you can drizzle with a little honey, top with fresh berries, or add a sprinkle of flaky sea salt for extra flair. Pair with espresso or a glass of dessert wine for a truly special treat!
Storage and Reheating
Store leftover cheesecake tightly covered in the refrigerator for up to 4 days. For best texture, allow slices to sit at room temperature for 10-15 minutes before serving. Freezing is possibleâ€â€wrap individual slices in plastic wrap and foil, then freeze for up to 1 month. Thaw overnight in the fridge before enjoying. Reheating isn’t recommended, but chilled cheesecake is always delicious!
Frequently Asked Questions About Loaf Pan Basque Cheesecake (FAQ)
Q: Can I make this cheesecake ahead of time?A: Absolutely! In fact, it tastes even better after chilling for several hours or overnight. Perfect for prepping in advance.
Q: Do I need a water bath for this recipe?A: No water bath is neededâ€â€the high oven temperature creates the classic caramelized top and creamy inside without any extra hassle.
Q: Can I use a different size pan?A: Yes! If using a slightly smaller or larger loaf pan, just keep an eye on the baking time and check for that signature jiggle in the center.
Q: Why is my cheesecake still jiggly in the middle?A: That’s exactly what you want! The center should be quite jiggly when you pull it from the oven; it will firm up as it cools.
If you’re craving something rich, creamy, and utterly unique, this Loaf Pan Basque Cheesecake is the ultimate treat. Give it a try, and don’t forget to leave a comment or rating belowâ€â€I’d love to hear how it turned out for you!
Ingredients
- 16 oz (450g) cream cheese, softened to room temperature
- ¾ cup (150g) granulated sugar
- 3 large eggs, room temperature
- 1 ¼ cups (300ml) heavy cream, cold
- 1 teaspoon vanilla extract
- ¼ teaspoon kosher salt
- 2 tablespoon (15g) all-purpose flour
Instructions
-
1Preheat oven to 425 °F (220 °C). Line a 9x5-inch loaf pan with parchment paper, leaving overhang.
-
2In a large bowl, beat cream cheese and sugar until very smooth and fluffy, about 2 minutes.
-
3Beat in eggs, one at a time, fully incorporating after each addition.
-
4Add heavy cream, vanilla extract, and salt. Mix until just combined.
-
5Sift in flour and gently fold to combine.
-
6Pour batter into lined loaf pan. Tap the pan on the counter to remove air bubbles.
-
7Bake for 33-38 minutes, or until the top is dark golden brown and the center still jiggles.
-
8Cool completely in the pan on a wire rack. Chill for at least 2 hours before slicing and serving.
Approximate Information for One Serving
Nutrition Disclaimers
Number of total servings shown is approximate. Actual number of servings will depend on your preferred portion sizes.
Nutritional values shown are general guidelines and reflect information for 1 serving using the ingredients listed, not including any optional ingredients. Actual macros may vary slightly depending on specific brands and types of ingredients used.
Did you make this recipe?
Please consider Pinning it!!