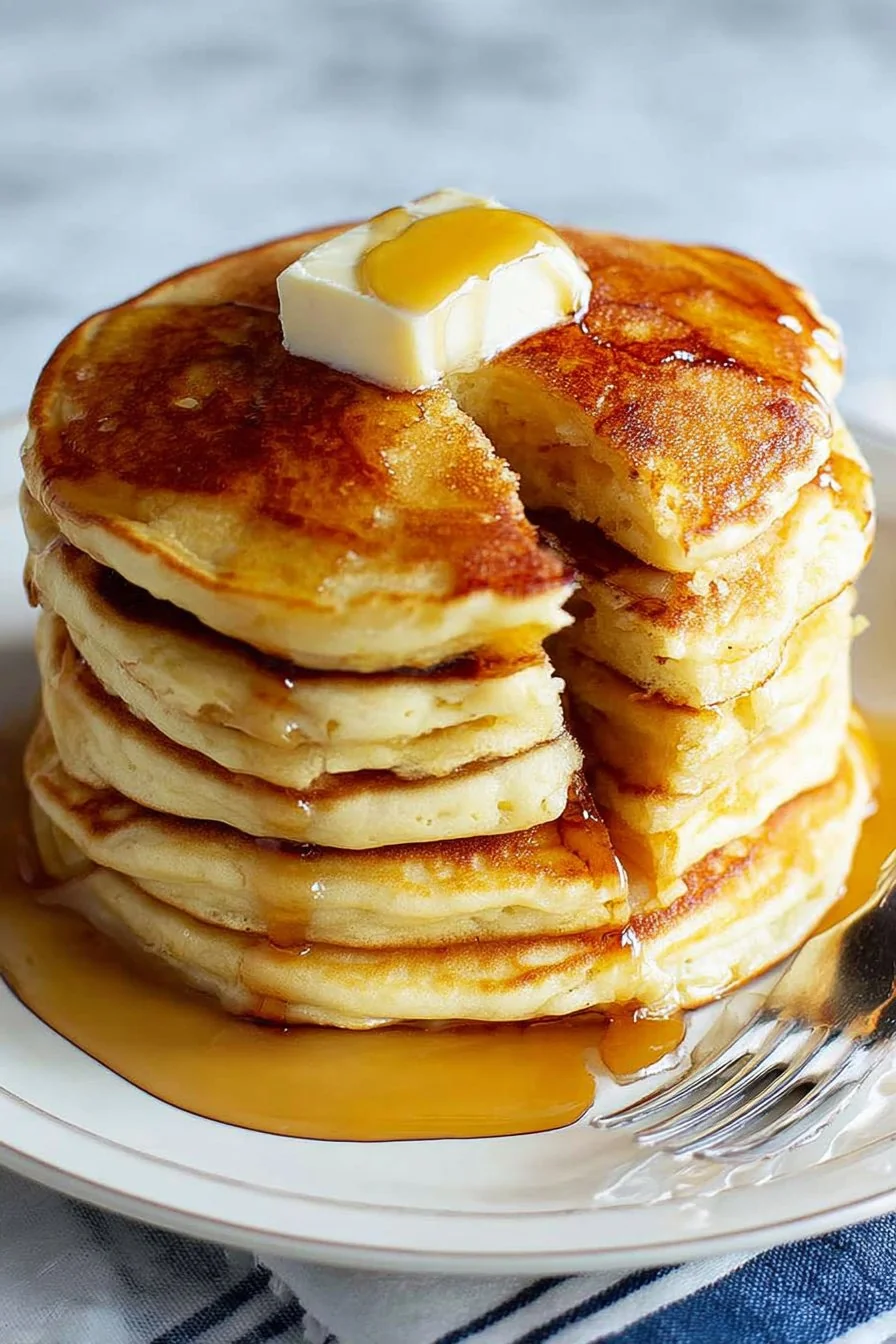
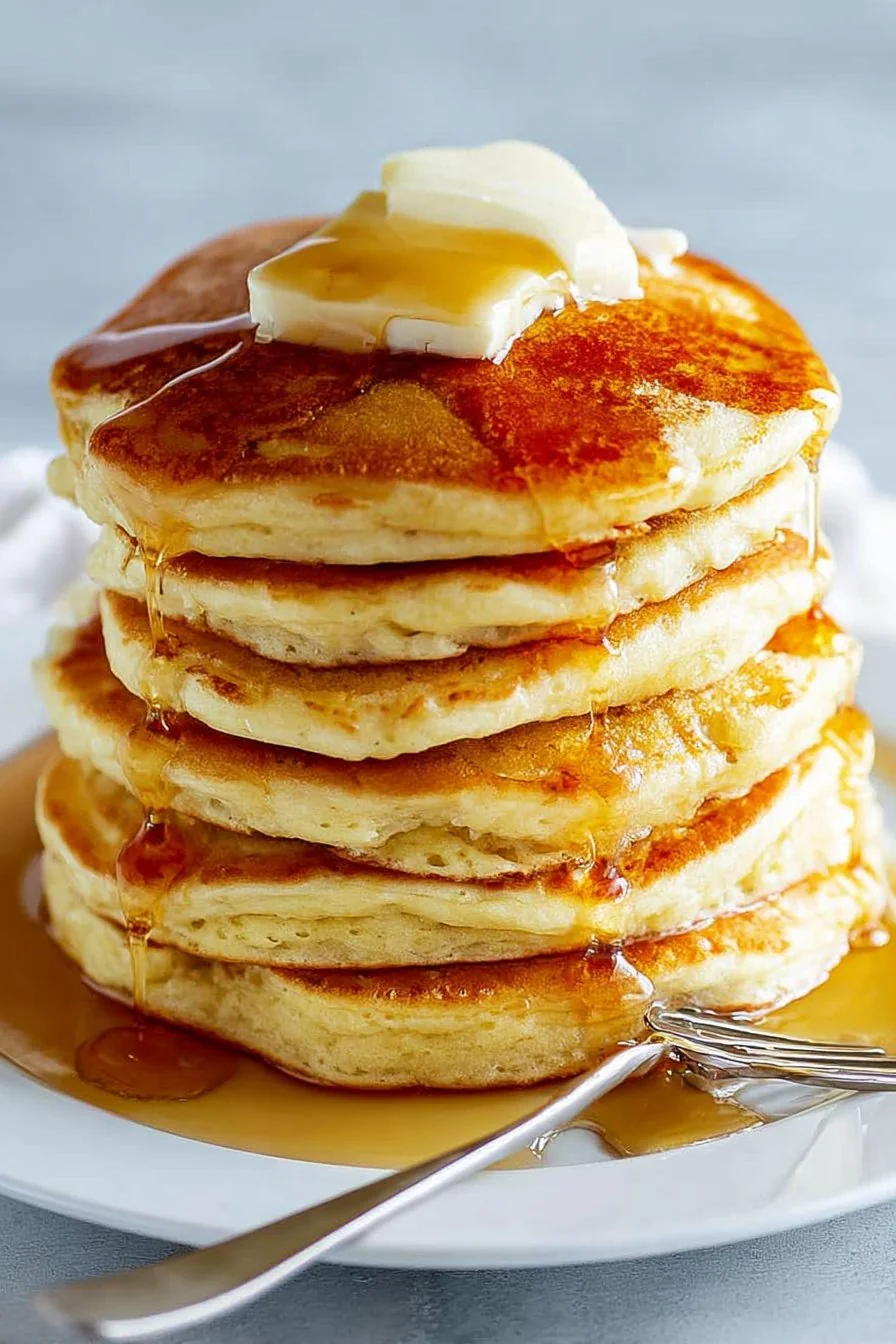
If you crave pancakes that are impossibly fluffy, golden, and tenderâ€â€with not a speck of gluten in sightâ€â€these are the ones you need in your life! Meet The Best Gluten-Free Pancakes, your ticket to a classic, comforting breakfast that’s just as delicious as the traditional version.
Each bite is light, pillowy, and packed with that comforting, nostalgic flavor you love. No strange textures, no dense or gummy middlesâ€â€just perfect pancakes, every single time.
These beauties whip up in just 30 minutes, making them ideal for busy mornings, lazy weekend brunches, or anytime you want to treat yourself. Plus, the recipe is super versatileâ€â€customize with your favorite add-ins and toppings to make your stack unique!
Inspired by a family tradition (and years of gluten-free experimenting!), this recipe is a keeper. You don’t have to sacrifice flavor or textureâ€â€trust me, you won’t even miss the gluten.
Why You'll Love This Recipe
- Unbelievably light and fluffyâ€â€just like classic pancakes!
- Quick and easy: Ready in 30 minutes with simple pantry staples
- Naturally gluten-free and easy to make dairy-free or nut-free
- Perfectly customizable: add chocolate chips, berries, or your favorite mix-ins
Key Ingredients for The Best Gluten-Free Pancakes
See recipe card below for full list of measurements, ingredients, and instructions.Gluten-Free All-Purpose Flour Blend
This is the secret to the pancakes’ classic texture and rise. Look for a blend that contains xanthan gumâ€â€it helps mimic the stretch and structure of wheat flour. If your blend doesn’t include xanthan gum, you can add a ½ teaspoon to the dry ingredients. Bob’s Red Mill 1-to-1 and King Arthur Measure for Measure are two excellent choices. Avoid single-flour options (like just rice flour) for best results.
Baking Powder
Baking powder is the key leavener in this recipe, giving the pancakes their signature fluffiness and lift. Make sure your baking powder is fresh for maximum rise! If you’re sensitive to corn, use a corn-free baking powder.
Milk (Dairy or Non-Dairy)
Milk creates a tender crumb and helps the batter come together smoothly. Any milk will work hereâ€â€dairy, almond, oat, or soy. For extra richness, use whole milk or unsweetened almond milk. If you need a nut-free option, oat or rice milk work perfectly.
Eggs
Eggs help bind the pancakes and add a lovely richness. If you need an egg-free (vegan) version, use 2 flax eggs (2 tablespoons ground flaxseed + 6 tablespoons water). Be aware the texture will be slightly different but still tasty.
Pure Maple Syrup
A touch of maple syrup sweetens the batter and adds that classic breakfast flavor. You can substitute honey, agave, or even sugar if you preferâ€â€a little sweetness goes a long way!
Instructions for The Best Gluten-Free Pancakes
See recipe card below for full list of measurements, ingredients, and instructions.Whisk Together the Dry Ingredients
In a large mixing bowl, combine the gluten-free flour, sugar or maple syrup, baking powder, baking soda, and salt. Whisk well to ensure everything is evenly distributedâ€â€this helps prevent pockets of baking powder and ensures even fluffiness.
Mix the Wet Ingredients
In a separate bowl, whisk together the milk, eggs, melted butter (or oil), and vanilla extract until smooth and fully combined. If using non-dairy milk, give it a good shake before measuring.
Combine and Rest the Batter
Pour the wet ingredients into the dry ingredients. Gently stir with a spatula until just combinedâ€â€don’t overmix! A few lumps are totally fine. Let the batter sit for 5-10 minutes; this brief rest helps the gluten-free flour hydrate and results in fluffier pancakes.
Heat the Pan and Cook the Pancakes
Preheat a nonstick skillet or griddle over medium heat and brush lightly with butter or oil. Once hot, pour about ¼ cup of batter for each pancake onto the pan. Cook for 2-3 minutes, until bubbles form on the surface and the edges look set. Flip and cook another 1-2 minutes, until golden brown. Adjust the heat as needed to prevent burning.
Serve and Enjoy!
Serve your pancakes hot off the griddle with your favorite toppingsâ€â€think maple syrup, fresh berries, a dollop of dairy-free yogurt, or chocolate chips. Enjoy every fluffy bite!
Recipe Variations
Make It Dairy-Free
Simply use your favorite unsweetened non-dairy milk (like almond, oat, or soy) and swap the butter for coconut oil or a neutral oil. The pancakes turn out just as fluffy and delicious!
Add Mix-Ins
Fold in a handful of chocolate chips, blueberries, or chopped nuts to the batter before cooking for extra flavor and fun textures.
Vegan Option
Replace the eggs with 2 flax eggs (2 tablespoons ground flaxseed mixed with 6 tablespoons water, let sit for 5 minutes) and use non-dairy milk and oil. The pancakes will be a bit more tender but still excellent.
Whole-Grain Boost
Swap half of the gluten-free flour blend with certified gluten-free oat flour for a heartier, slightly nutty pancake.
Savory Twist
Omit the sugar and vanilla, and stir in chopped herbs, spinach, or cheese for a savory pancake perfect for breakfast sandwiches or brunch boards.
Serving Suggestions
Serve these gluten-free pancakes stacked high with a generous pour of pure maple syrup, fresh berries, and a dusting of powdered sugar. They pair beautifully with crispy bacon, scrambled eggs, or a fruity breakfast smoothie for a complete and satisfying meal. For a fun brunch spread, offer toppings like nut butter, dairy-free whipped cream, or even lemon curd.
Storage and Reheating
Leftover pancakes can be cooled, then stored in an airtight container in the refrigerator for up to 3 days. To reheat, pop them in a toaster, toaster oven, or warm skillet over low heat until heated throughâ€â€they’ll taste just as fresh! For longer storage, freeze pancakes in a single layer on a baking sheet, then transfer to a freezer-safe bag for up to 2 months. Reheat straight from frozen in the toaster or microwave.
Frequently Asked Questions About The Best Gluten-Free Pancakes (FAQ)
Q: Can I use almond flour or coconut flour instead of a gluten-free flour blend?A: Almond or coconut flour behave very differently and will not produce the same fluffy texture. For best results, stick to a gluten-free all-purpose blend with xanthan gum.
Q: Why did my gluten-free pancakes turn out gummy or dense?A: Overmixing the batter or using the wrong flour blend can lead to dense pancakes. Be gentle when mixing and let the batter rest before cooking for the best texture.
Q: Can I make the batter ahead of time?A: It’s best to cook the pancakes right after mixing, as the leavening agents lose their power over time. However, you can prep the dry and wet ingredients separately and combine just before cooking.
These gluten-free pancakes are the real dealâ€â€fluffy, golden, and crowd-pleasing every single time. Give this recipe a try and see how easy and delicious gluten-free breakfast can be! If you love them, leave a comment and rating below. Happy flipping!
Ingredients
- 1 ½ cups gluten-free all-purpose flour blend (with xanthan gum)
- 2 tablespoons sugar or pure maple syrup
- 2 teaspoons baking powder
- ½ teaspoon baking soda
- ½ teaspoon fine sea salt
- 1 ¼ cups milk (dairy or non-dairy)
- 2 large eggs
- 2 tablespoons melted butter or neutral oil (plus more for cooking)
- 1 teaspoon pure vanilla extract
Instructions
-
1In a large bowl, whisk together gluten-free flour, sugar or maple syrup, baking powder, baking soda, and salt.
-
2In a separate bowl, whisk milk, eggs, melted butter or oil, and vanilla extract until combined.
-
3Add the wet ingredients to the dry ingredients and gently stir until just incorporated. Don’t overmix; let batter rest for 5–10 minutes.
-
4Heat a nonstick skillet or griddle over medium heat and brush with a little butter or oil.
-
5Pour ¼ cup batter per pancake onto the skillet. Cook for 2–3 minutes, until bubbles form and edges look set. Flip and cook 1–2 minutes more.
-
6Repeat with remaining batter, adding more butter or oil as needed. Serve warm with your favorite toppings.
Approximate Information for One Serving
Nutrition Disclaimers
Number of total servings shown is approximate. Actual number of servings will depend on your preferred portion sizes.
Nutritional values shown are general guidelines and reflect information for 1 serving using the ingredients listed, not including any optional ingredients. Actual macros may vary slightly depending on specific brands and types of ingredients used.
Did you make this recipe?
Please consider Pinning it!!