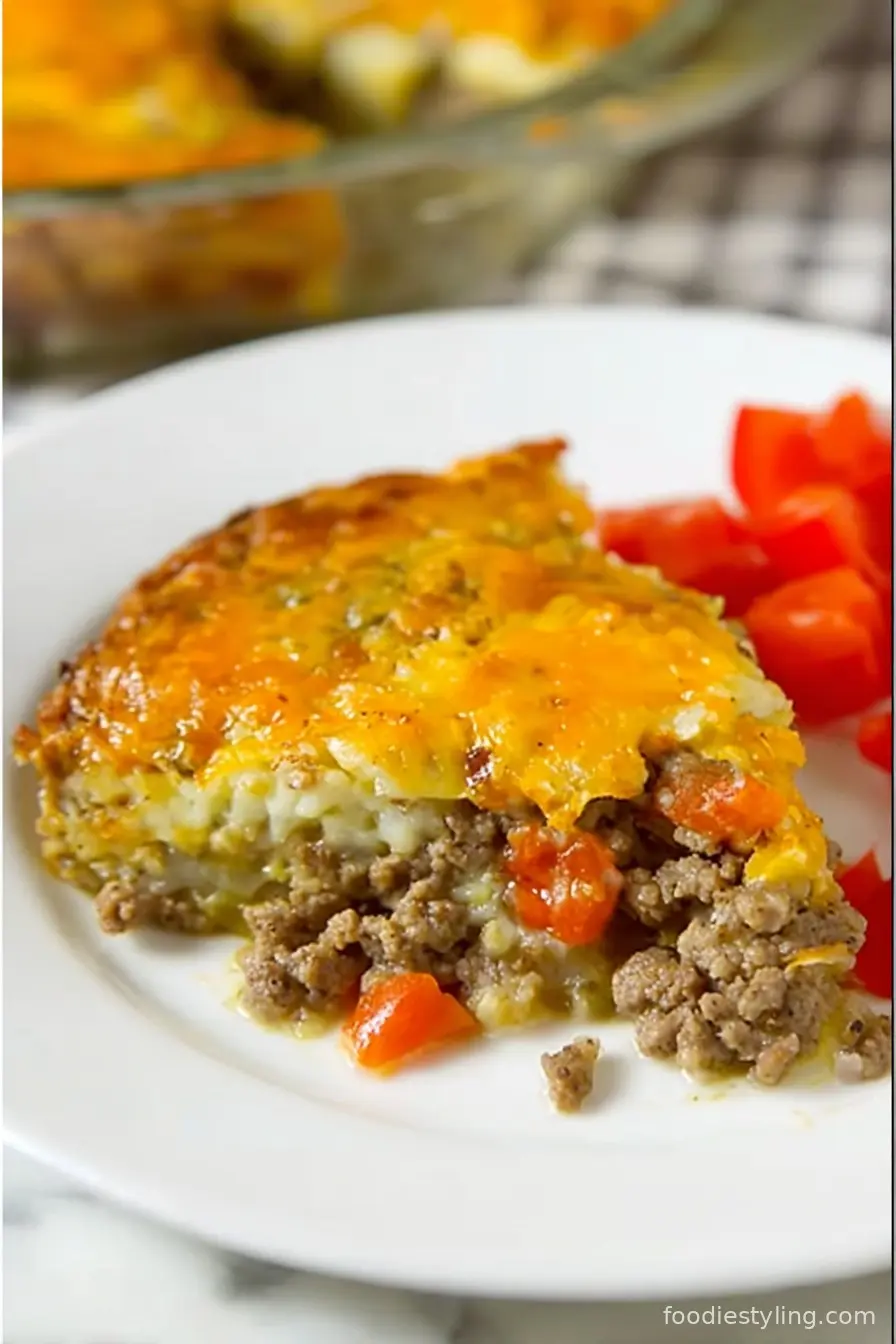
Cheeseburger Pie with Bisquick is a delightful, comforting dish that effortlessly blends the juicy flavors of a classic cheeseburger with the ease and simplicity of a savory pie.
This recipe has become a cherished favorite in many households, especially for those seeking a fuss-free way to enjoy a hearty, home-cooked meal. Bisquick, a pre-mixed baking staple, streamlines the preparation process, allowing busy families to bring this traditional American comfort food to their tables in under an hour.
The origins of cheeseburger pie date back to the mid-20th century, when convenience foods grew in popularity and home cooks looked for ways to reinvent traditional meals in new, practical forms.
The adaptation of a cheeseburger into pie form was both an innovative and resourceful solution—transforming a handheld favorite into a one-pan dinner that can feed a crowd with minimal cleanup. Today, cheeseburger pie with Bisquick stands as a testament to the enduring spirit of American home cooking.
Its rich, beefy base, topped off with gooey cheese and a golden, fluffy Bisquick crust, makes it a delicious, family-approved option for weeknight meals, potlucks, and gatherings.
Whether you are a longtime fan or a newcomer to this flavorful classic, learning how to make cheeseburger pie with Bisquick will add a beloved staple to your recipe box, promising mouthwatering results every time.
In this comprehensive recipe guide, you’ll discover not only a foolproof method for baking cheeseburger pie with Bisquick, but also helpful tips, variations, nutrition information, and serving ideas to ensure this dish finds a permanent place in your rotation.
Ingredients
- 1 pound ground beef (85% lean recommended)
- 1 medium yellow onion, diced
- 1 teaspoon salt
- ½ teaspoon ground black pepper
- 2 cloves garlic, minced
- 1 cup shredded cheddar cheese (mild or sharp)
- ½ cup milk
- 2 large eggs
- 1 cup Bisquick baking mix
- 1 tablespoon ketchup (optional)
- 1 tablespoon yellow mustard (optional)
- 2 tablespoons chopped pickles (optional)
- ¼ teaspoon smoked paprika (optional for added flavor)
- Nonstick cooking spray or butter for greasing
Instructions
- Preheat your oven to 400°F (200°C). Grease a 9-inch pie plate or baking dish with nonstick spray or butter.
- In a large skillet over medium heat, cook the ground beef until it begins to brown, about 4-5 minutes. Add the diced onion and cook until soft, another 3-4 minutes.
- Stir in the minced garlic, salt, black pepper, and any optional seasonings (ketchup, mustard, smoked paprika). Cook for an additional minute, then remove from heat.
- Drain excess fat from the beef mixture, then evenly spread it across the bottom of the prepared pie plate. Sprinkle the chopped pickles (if using) and half of the shredded cheddar over the meat mixture.
- In a medium bowl, whisk together the eggs, milk, and Bisquick baking mix until smooth and no lumps remain.
- Pour the Bisquick mixture evenly over the beef filling in the pie plate, ensuring thorough coverage.
- Sprinkle the remaining shredded cheddar cheese over the top, distributing evenly.
- Bake in the preheated oven for 25-30 minutes, or until the top is set, lightly golden, and a knife inserted in the center comes out clean.
- Remove from oven and let rest for 5-10 minutes before slicing. Serve warm, optionally garnished with extra pickles, tomatoes, or your favorite burger toppings.
Nutritional Information
This classic cheeseburger pie with Bisquick offers a balanced nutritional profile, making it ideal for a family dinner that satisfies hunger without excess. Each serving (assuming 6 servings) contains approximately 380-420 calories. The primary macronutrient is protein, with about 20-24 grams per serving from the ground beef, eggs, and cheese.
Fat content ranges from 22 to 27 grams, predominantly from the beef and cheese, with options to reduce this by choosing leaner meat or low-fat cheese. Carbohydrates come from the Bisquick mix and milk, providing about 18-22 grams per serving.
The pie also offers calcium, thanks to the cheese and milk, as well as minerals like iron and potassium from the beef and eggs. Cholesterol is moderate from eggs and cheese but can be managed by using heart-healthy alternatives.
For those watching sodium, reducing added salt or selecting low-sodium cheese can help. This dish also offers B-vitamins, vitamin A, and small amounts of dietary fiber if you include add-ins like chopped vegetables or whole-wheat Bisquick.
Overall, cheeseburger pie with Bisquick is a filling, protein-rich meal, especially when balanced with a side salad or steamed vegetables.

Wine and Beverage Pairings
Cheeseburger pie with Bisquick pairs wonderfully with a wide range of beverages. For a casual, family-friendly meal, serve with classic iced tea, sparkling water with lemon, or a refreshing lemonade.
If you’re looking for a wine pairing, a medium-bodied red, such as Merlot, Zinfandel, or Syrah, complements the dish’s rich, cheesy flavors without overpowering them. For beer lovers, try a mild lager or amber ale that matches the comfort-food style of the pie.
Those preferring non-alcoholic options might enjoy a root beer or a craft cola for a nostalgic diner feel alongside their slice.
Cooking Tips and Variations
For perfect cheeseburger pie with Bisquick, opt for fresh ground beef with an 85% lean ratio for the best combination of flavor and juiciness. Sautéing the onion before mixing it with the meat boosts sweetness and reduces harshness, adding depth to the filling.
Draining off any excess fat ensures your pie isn’t greasy. If you want a healthier version, substitute ground turkey or chicken, or use half beef and half turkey. Increase nutritional value by adding finely shredded carrots, diced bell peppers, or even spinach to the meat mixture.
For a richer taste, consider swapping cheddar for Monterey Jack, pepper jack, or a blend of cheeses. Make individual cheeseburger pies using muffin tins for perfectly portioned servings—great for meal prep or lunchboxes. For a gluten-free version, use gluten-free Bisquick and ensure your other ingredients are certified gluten-free.
If your family enjoys bold flavors, mix in a tablespoon of barbecue sauce or a dash of hot sauce. Leftover slices reheat beautifully; wrap them tightly and refrigerate for up to three days, or freeze individually for up to two months.
To reheat, simply microwave or bake at 350°F for about 15 minutes.

Serving Suggestions
This savory cheeseburger pie with Bisquick is incredibly versatile when it comes to serving. After letting the pie rest for a few minutes post-baking, slice it into generous wedges and present it directly from the pie dish for a cozy, family-style meal.
For a well-rounded dinner, pair each serving with a crisp green salad tossed in a light vinaigrette, or serve steamed green beans, roasted broccoli, or corn on the cob on the side.
For extra cheeseburger flair, set out small bowls of classic burger toppings, such as sliced tomatoes, shredded lettuce, avocado, diced onions, or additional pickles, allowing everyone to customize their plate. A drizzle of ketchup, mustard, or a tangy burger sauce on top is always a hit, especially with younger diners.
For informal gatherings, cut the pie into smaller portions and serve as a hearty appetizer. If you’re entertaining, try making mini cheeseburger pies in ramekins or muffin tins for single-serve appetizers that are easy to pick up and eat.
Leftovers can be wrapped and reheated for busy weeknight lunches, transforming into quick and tasty hand-held slices. This dish also works well for meal prep; simply bake, cool, and portion out slices for easy grab-and-go meals throughout the week.
By offering a mix of sides and toppings, you can cater to various tastes and appetites, making cheeseburger pie with Bisquick a go-to recipe for any occasion.
Health Benefits
Cheeseburger pie with Bisquick can be a surprisingly balanced meal when prepared thoughtfully. It’s an excellent source of high-quality protein from the beef, eggs, and cheese, supporting muscle maintenance and repair.
The milk and cheese provide calcium for strong bones and teeth, while eggs contribute essential vitamins like B12 and D. Adding onions and optional vegetables boosts the dish’s fiber, antioxidants, and micronutrient content. To create a lighter version, use lean ground beef (or even turkey), reduced-fat cheese, and low-fat milk.
Choosing whole grain or gluten-free Bisquick further enhances fiber content and dietary diversity. While the dish is moderate in fat and sodium, balance is easily achieved by serving with fresh produce and controlling portion size.
This recipe is suitable for busy lifestyles, offering sustained energy, minimal processed ingredients, and a sense of satisfaction that curbs excessive snacking. As always, those with dietary restrictions or allergies should review ingredient labels and make appropriate substitutions.
With mindful adjustments, cheeseburger pie with Bisquick can be incorporated into a wholesome, well-rounded eating plan.
Frequently Asked Questions
Yes, you can fully assemble and bake the pie ahead of time. Store it covered in the refrigerator for up to three days. Reheat slices in the microwave or oven before serving.
Absolutely. Ground turkey or chicken makes a lighter alternative to beef. Just be sure to season well, as these meats are milder in flavor.
Traditional Bisquick contains gluten, but you can easily substitute with a gluten-free baking mix for a celiac-friendly version. Check all other ingredients as well for gluten content.
Cheddar is classic, but feel free to use Monterey Jack, mozzarella, Colby Jack, or a blend for different flavors and melt qualities.
Yes, cheeseburger pie freezes very well. Wrap cooled slices individually and freeze for up to two months. Reheat directly from frozen or thaw in the refrigerator first.
Cheeseburger pie with Bisquick is a delightful, fuss-free recipe that brings the beloved flavors of a classic cheeseburger to your dinner table in a unique and comforting way. With its savory beef filling, golden Bisquick crust, and melty cheese topping, it’s no wonder this dish remains a family favorite through generations. Easy to customize, quick to prepare, and perfect for weeknight dinners or gatherings, cheeseburger pie with Bisquick is sure to become a staple in your home. Enjoy experimenting with add-ins, toppings, and sides to suit every taste, and take comfort in knowing this recipe is as wholesome as it is delicious. Treat your family to this cozy dinner and delight in both the taste and the convenience—all in one hearty slice.
Ingredients
- 1 pound ground beef (85% lean recommended)
- 1 medium yellow onion, diced
- 1 teaspoon salt
- ½ teaspoon ground black pepper
- 2 cloves garlic, minced
- 1 cup shredded cheddar cheese (mild or sharp)
- ½ cup milk
- 2 large eggs
- 1 cup Bisquick baking mix
- 1 tablespoon ketchup (optional)
- 1 tablespoon yellow mustard (optional)
- 2 tablespoons chopped pickles (optional)
- ¼ teaspoon smoked paprika (optional for added flavor)
- Nonstick cooking spray or butter for greasing
Instructions
-
1Preheat your oven to 400°F (200°C). Grease a 9-inch pie plate or baking dish with nonstick spray or butter.
-
2In a large skillet over medium heat, cook the ground beef until it begins to brown, about 4-5 minutes. Add the diced onion and cook until soft, another 3-4 minutes.
-
3Stir in the minced garlic, salt, black pepper, and any optional seasonings (ketchup, mustard, smoked paprika). Cook for an additional minute, then remove from heat.
-
4Drain excess fat from the beef mixture, then evenly spread it across the bottom of the prepared pie plate. Sprinkle the chopped pickles (if using) and half of the shredded cheddar over the meat mixture.
-
5In a medium bowl, whisk together the eggs, milk, and Bisquick baking mix until smooth and no lumps remain.
-
6Pour the Bisquick mixture evenly over the beef filling in the pie plate, ensuring thorough coverage.
-
7Sprinkle the remaining shredded cheddar cheese over the top, distributing evenly.
-
8Bake in the preheated oven for 25-30 minutes, or until the top is set, lightly golden, and a knife inserted in the center comes out clean.
-
9Remove from oven and let rest for 5-10 minutes before slicing. Serve warm, optionally garnished with extra pickles, tomatoes, or your favorite burger toppings.
Approximate Information for One Serving
Nutrition Disclaimers
Number of total servings shown is approximate. Actual number of servings will depend on your preferred portion sizes.
Nutritional values shown are general guidelines and reflect information for 1 serving using the ingredients listed, not including any optional ingredients. Actual macros may vary slightly depending on specific brands and types of ingredients used.
To determine the weight of one serving, prepare the recipe as instructed. Weigh the finished recipe, then divide the weight of the finished recipe (not including the weight of the container the food is in) by the desired number of servings. Result will be the weight of one serving.
Did you make this recipe?
Please consider Pinning it!